

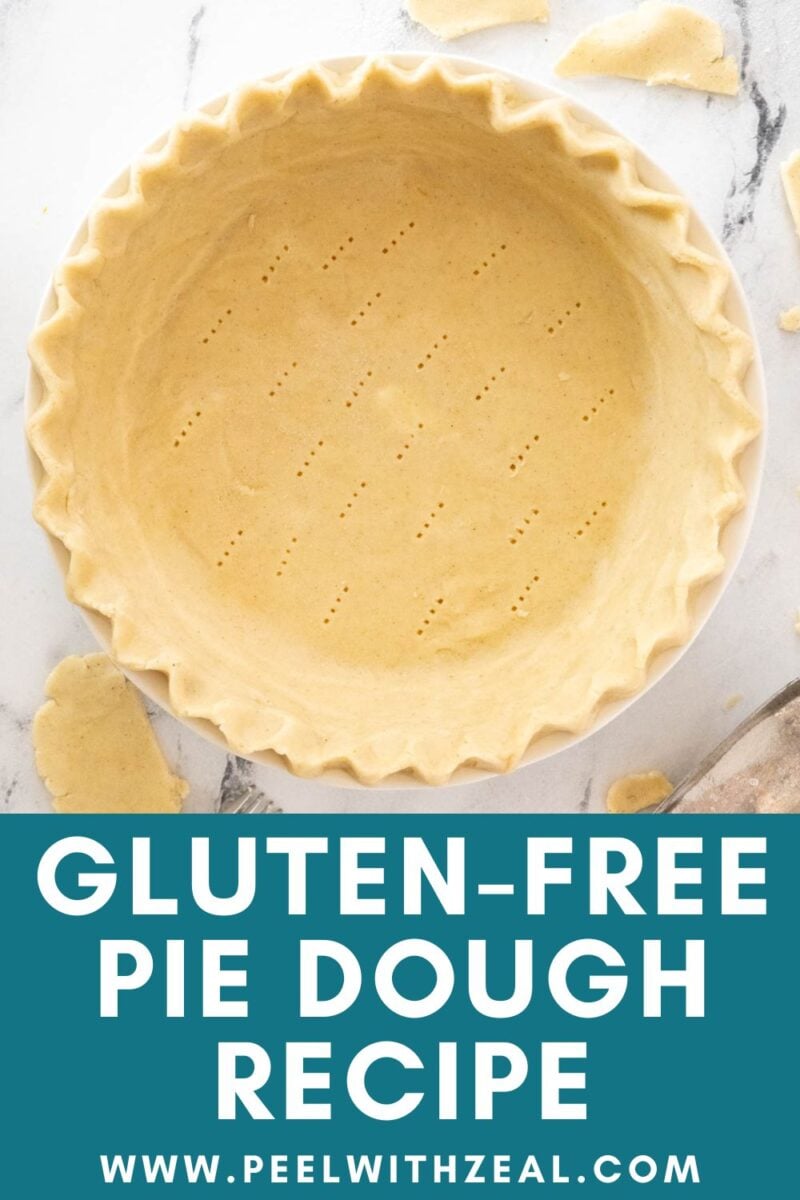
This gluten-free pie crust recipe is flaky, easy to make, and perfect for all my gluten-free pie recipes. Thanks to the addition of sour cream you will never struggle with making homemade pie dough again. This versatile dough is easy to work with and perfect for sweet and savory pies, just follow my step-by-step photo instructions or watch the video.
WANT TO SAVE THIS RECIPE?
This post may include affiliate links. Please read my disclosure policy.
Jump to:
- 📖Why My Recipe Works
- What is the Best Gluten-Free Flour for Pie Crust?
- 🧾Ingredient Notes
- ⏲️How to Make Gluten-Free Pie Dough
- Finish the Edges
- 🥧How to Par-Bake Pie Crust
- 🥧How to Blind Bake a Pie
- 👩🏻🍳 Troubleshooting
- 🌡️Make Ahead
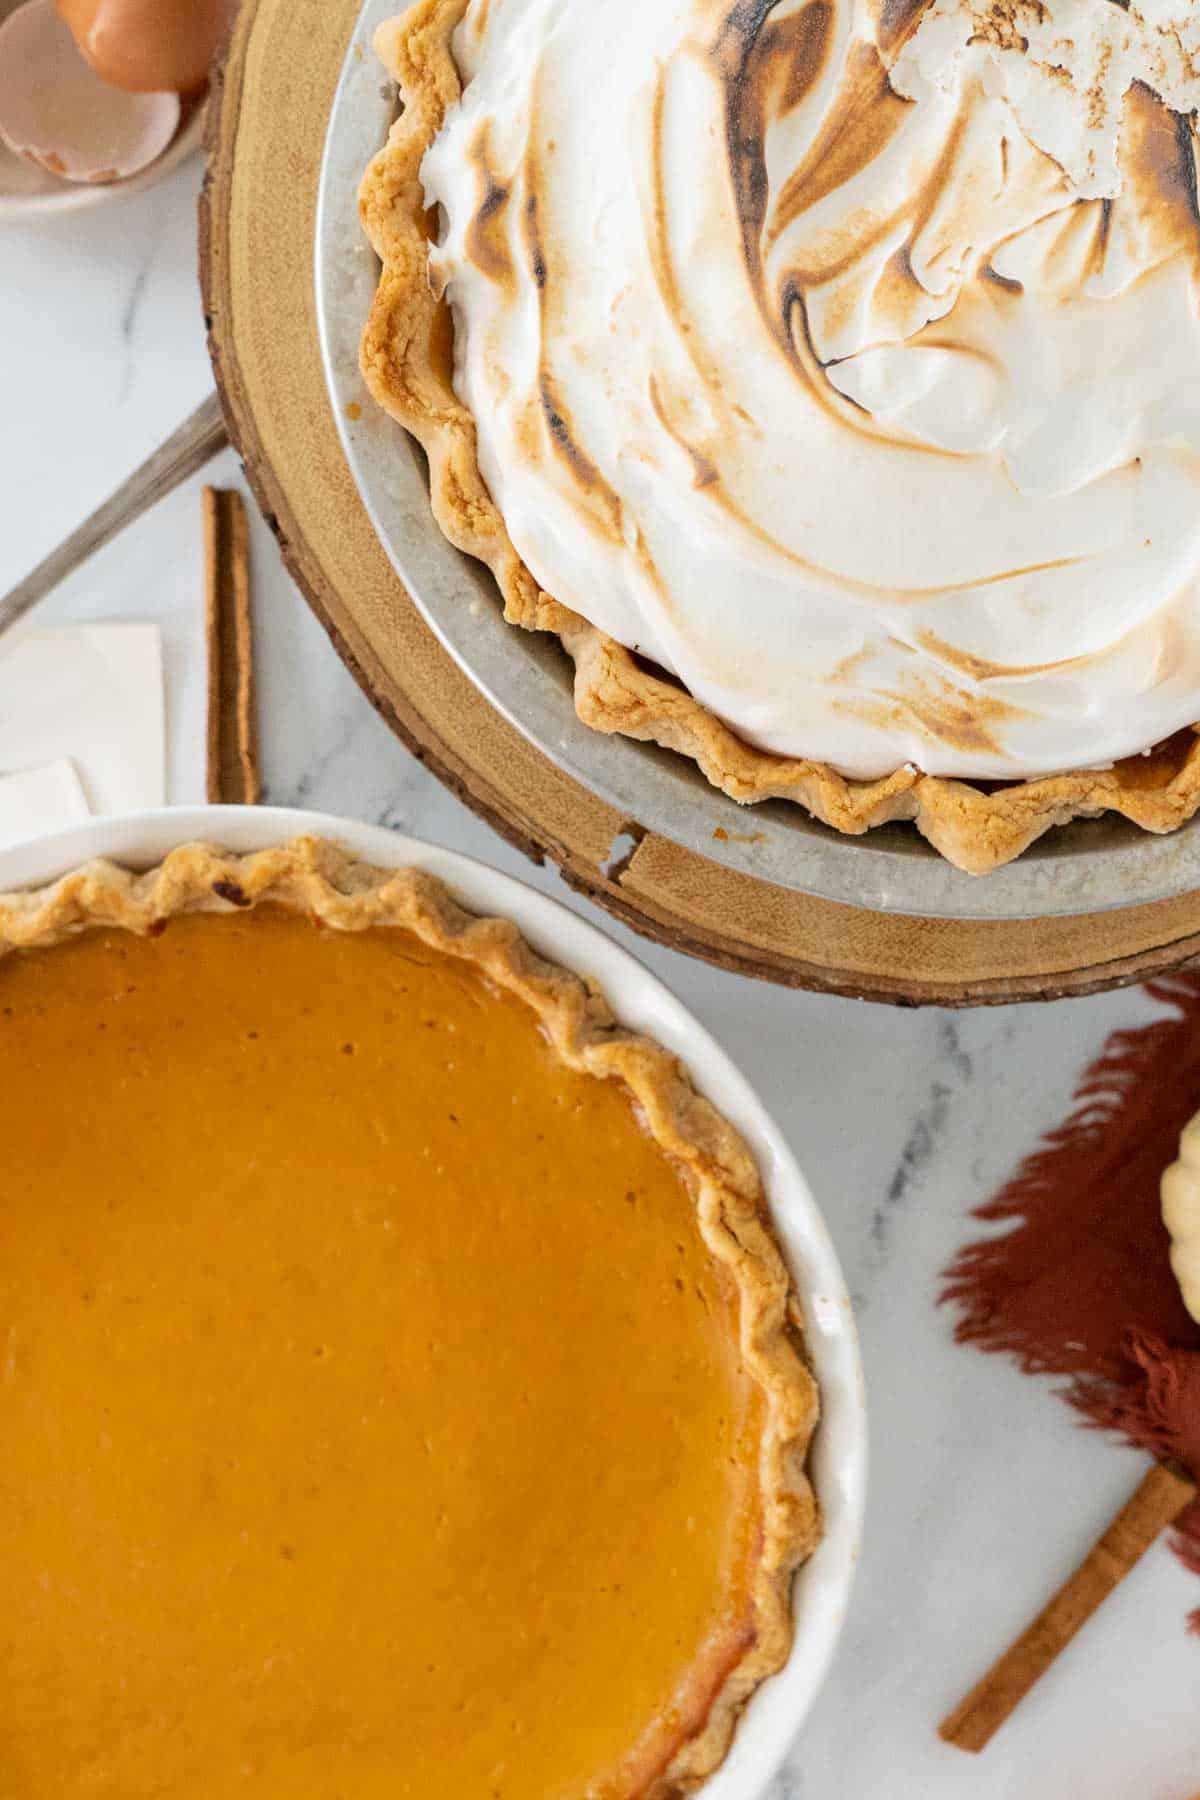
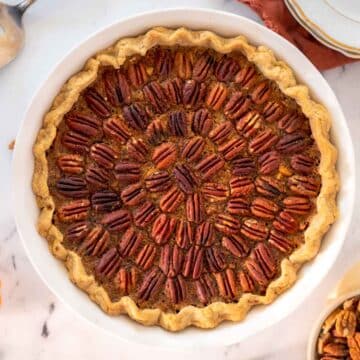
- Gluten-Free Pie Recipes
- 💬Frequently Asked Questions
- 📖 Recipe Card
- 🔪Equipment Notes
- ⭐Reviews
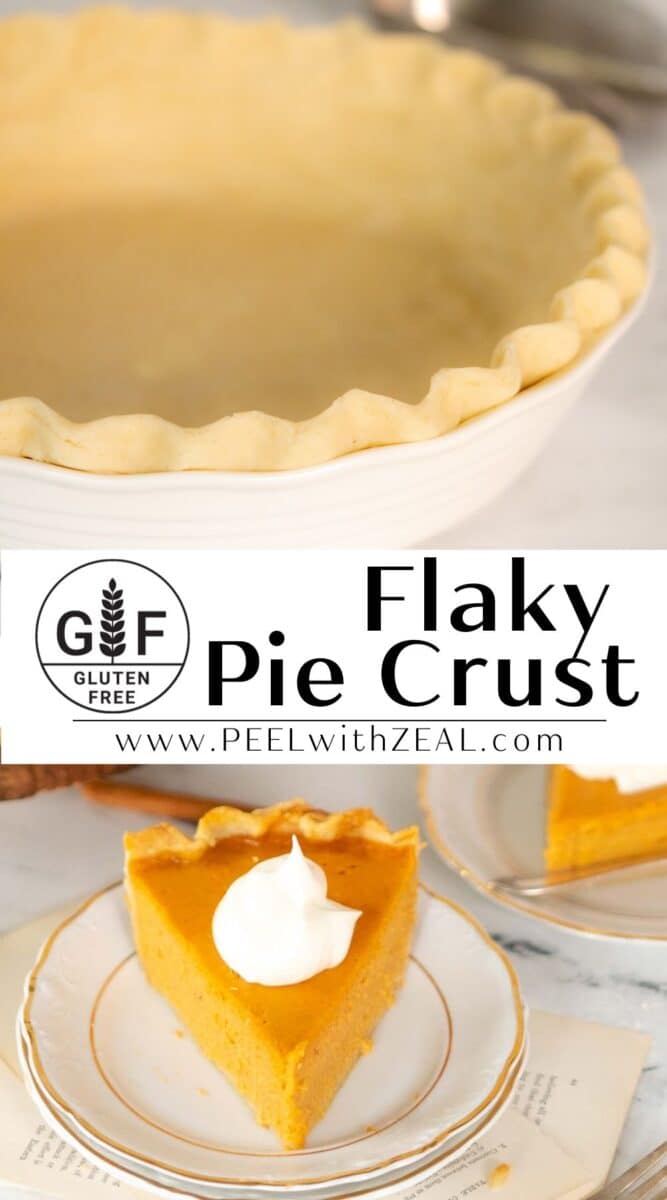
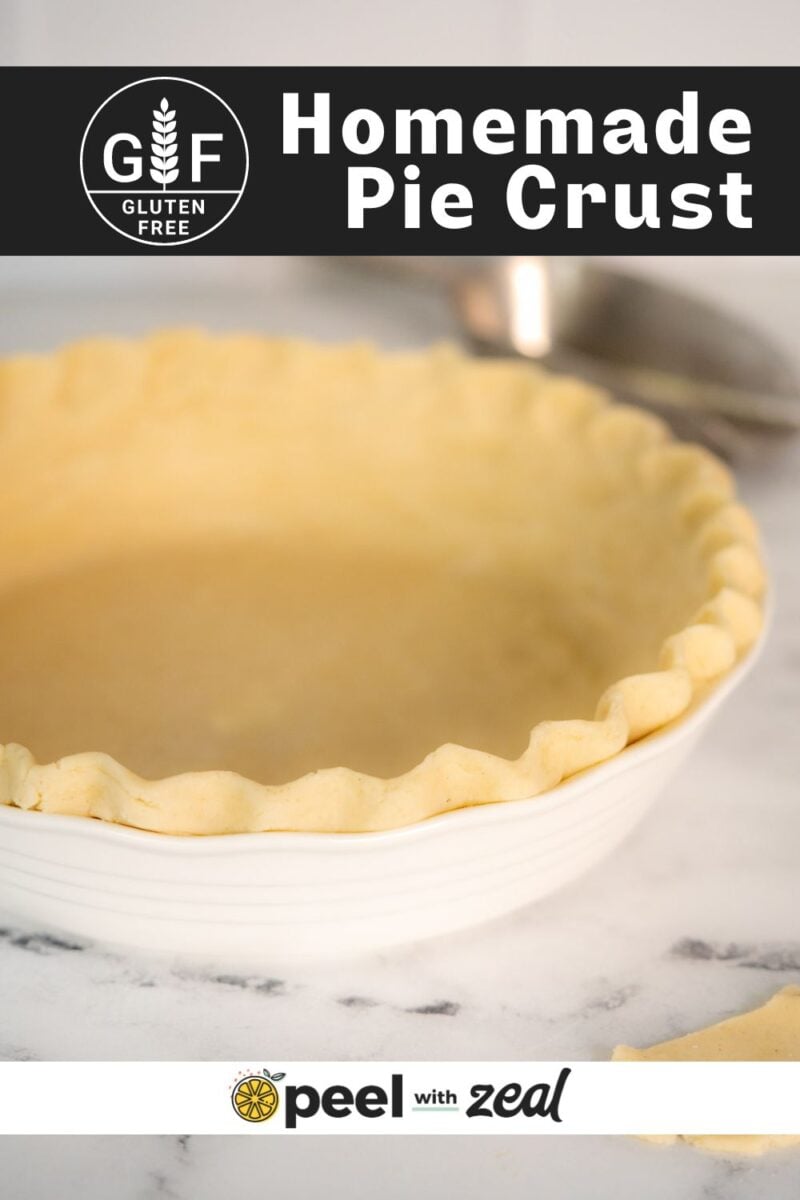
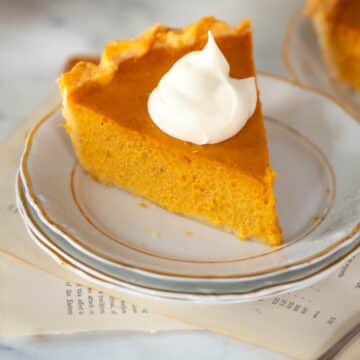
A good pie crust is tinted golden brown with a slightly blistered surface. It is light, crisp, and flaky, yet tender enough to break easily but not so tender it crumbles when cut.
The bottom crust should never resist the fork, but neither should it be soggy and absorb the filling.
This is a high standard for any baker, but especially when baking gluten-free pies. After many trials and tests, I have finally created the perfect buttery gluten-free pie crust recipe. And I am a pie crust aficionado. Check out my gluten-free graham cracker crust and my gluten-free tart crust (pate sablee)!
📖Why My Recipe Works
High Protein- Adding dry milk powder and sour cream increases the protein, meaning it has more structure. My gluten-free pasta recipe has all the details on the specific protein content of different flour blends.
Fat Content- This recipe uses slightly more fat than the standard 3-2-1 pie ratio
Tenderness- Apple cider vinegar and sour cream add tenderness and prevent crumbling.
What is the Best Gluten-Free Flour for Pie Crust?
To start, I have tested this recipe with my gluten-free flour blend, Bob's Red Mill 1:1 Flour and King Arthur 1:1 Flour all containing xanthan gum. If your blend does not contain this you must add it. Xanthan gum gives baked good structure and stability.
This recipe can be used with any commercially available flour but with one inexpensive addition. Dry milk powder! After reading tons of reviews on gluten-free flours one thing was clear. People really loved Cup 4 Cup but felt it was too expensive. After researching the ingredients I found the only major difference was the addition of a small amount of milk powder.
This ingredient is easy to find at almost any grocery store for just a couple of dollars. My gluten-free flour blend uses dry milk powder.
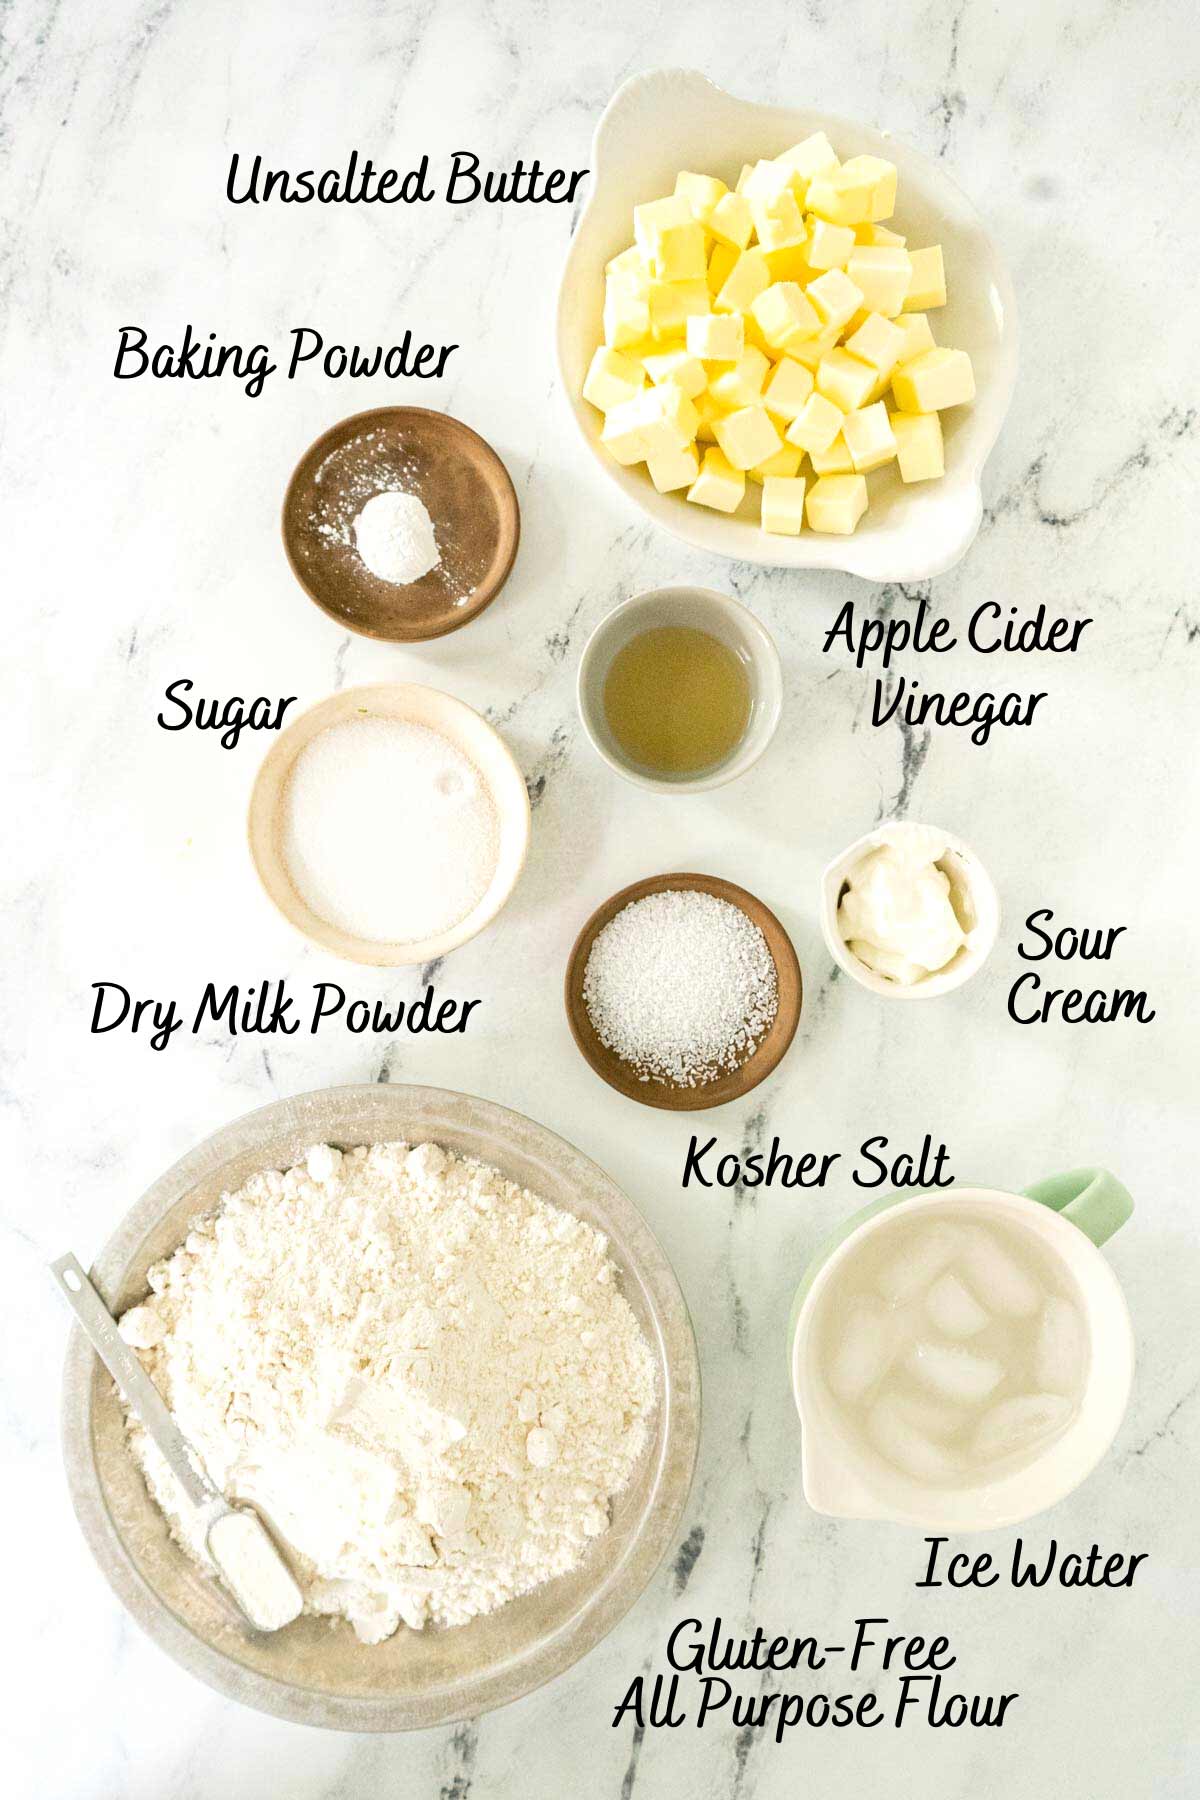
🧾Ingredient Notes
- Baking Powder- Just a pinch gives the pastry a slight puff to help increase the flakiness. My gluten-free self-rising flour will have too much baking powder to use in this recipe.
- Dry Milk Powder- Found in the baking section.
- Unsalted Butter- Cut your butter into ½ inch cubes and freeze for 10 minutes before adding to the flour. If your butter is salted reduce the added salt by 50%.
- Ice Water- Not cold water but make an actual glass of ice water and then spoon out what you need.
- Apple Cider Vinegar- You can substitute rice vinegar or champagne vinegar.
- Sugar- While this isn't a pate sucre recipe, a dash of sugar is lovely for sweet bakes. Omit for savory pies like chicken pot pie.
- Sour Cream- Full-fat sour cream only. You can also use creme fraiche.
⏲️How to Make Gluten-Free Pie Dough
This recipe is written for a double-crust pie, i.e. two single-crust pies., for a 9-inch pie pan.
Even when I only need a single crust, I still make a full recipe. When going through the trouble of making homemade pie dough, you might as well make two and freeze one for later.
This recipe can be made in a food processor or by hand with a pastry blender. Recently I started using a pastry blender and have gotten quite accustomed to it!
Mix the Liquids
Place a small bowl or liquid measuring cup in the fridge for 10 minutes to chill. Whisk together all the liquid ingredients until combined.
Do not throw away your ice water. If you need more liquid you add just a sprinkling of cold water..
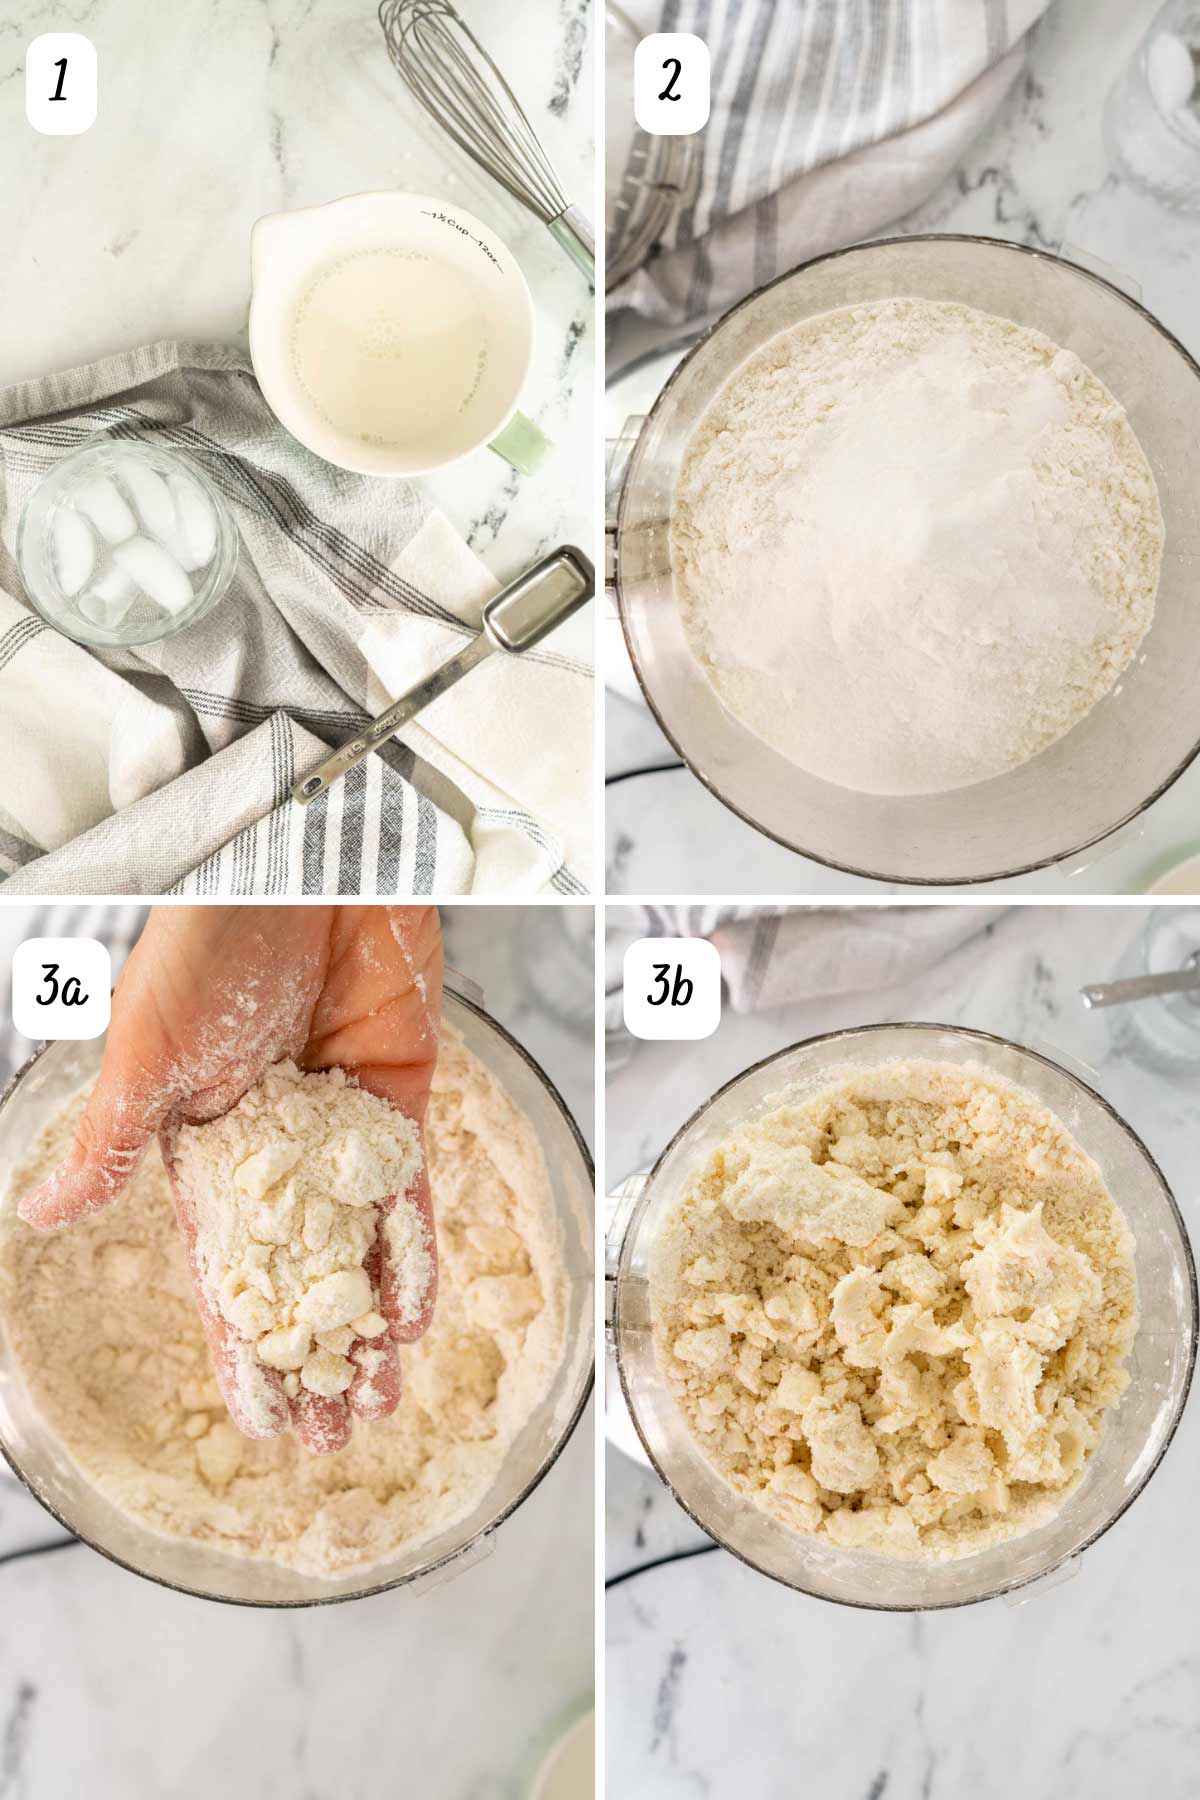
Mix Dry Ingredients
In a large bowl sift the dry ingredients together. If you are using a food processor pulse a few times to combine.
This might seem like an unnecessary step. However, pie dough isn't mixed or kneaded and minimal handling is necessary for a flaky crust. Therefore, be sure to thoroughly mix the dry ingredients.
Add the Butter
Add your cold butter to the food processor, you can do this in two steps if things are getting full. Pulse 10 to 12 times to break up the butter but do not mix it in.
Some recipe developers say walnut-size pieces, others pea-sized. The reality is somewhere in the middle is best.
Turn the food processor on and pour in the liquid. Pulse until just combined. It should look shaggy and a bit dry.
Chill the Dough
Turn the dough out of the bowl and onto the counter and form into a ball with your hands. Or my favorite trick; turn the dough onto parchment paper or plastic wrap.
Twist the paper around and the dough ball should form. This trick prevents you from overworking the dough and melting the butter.
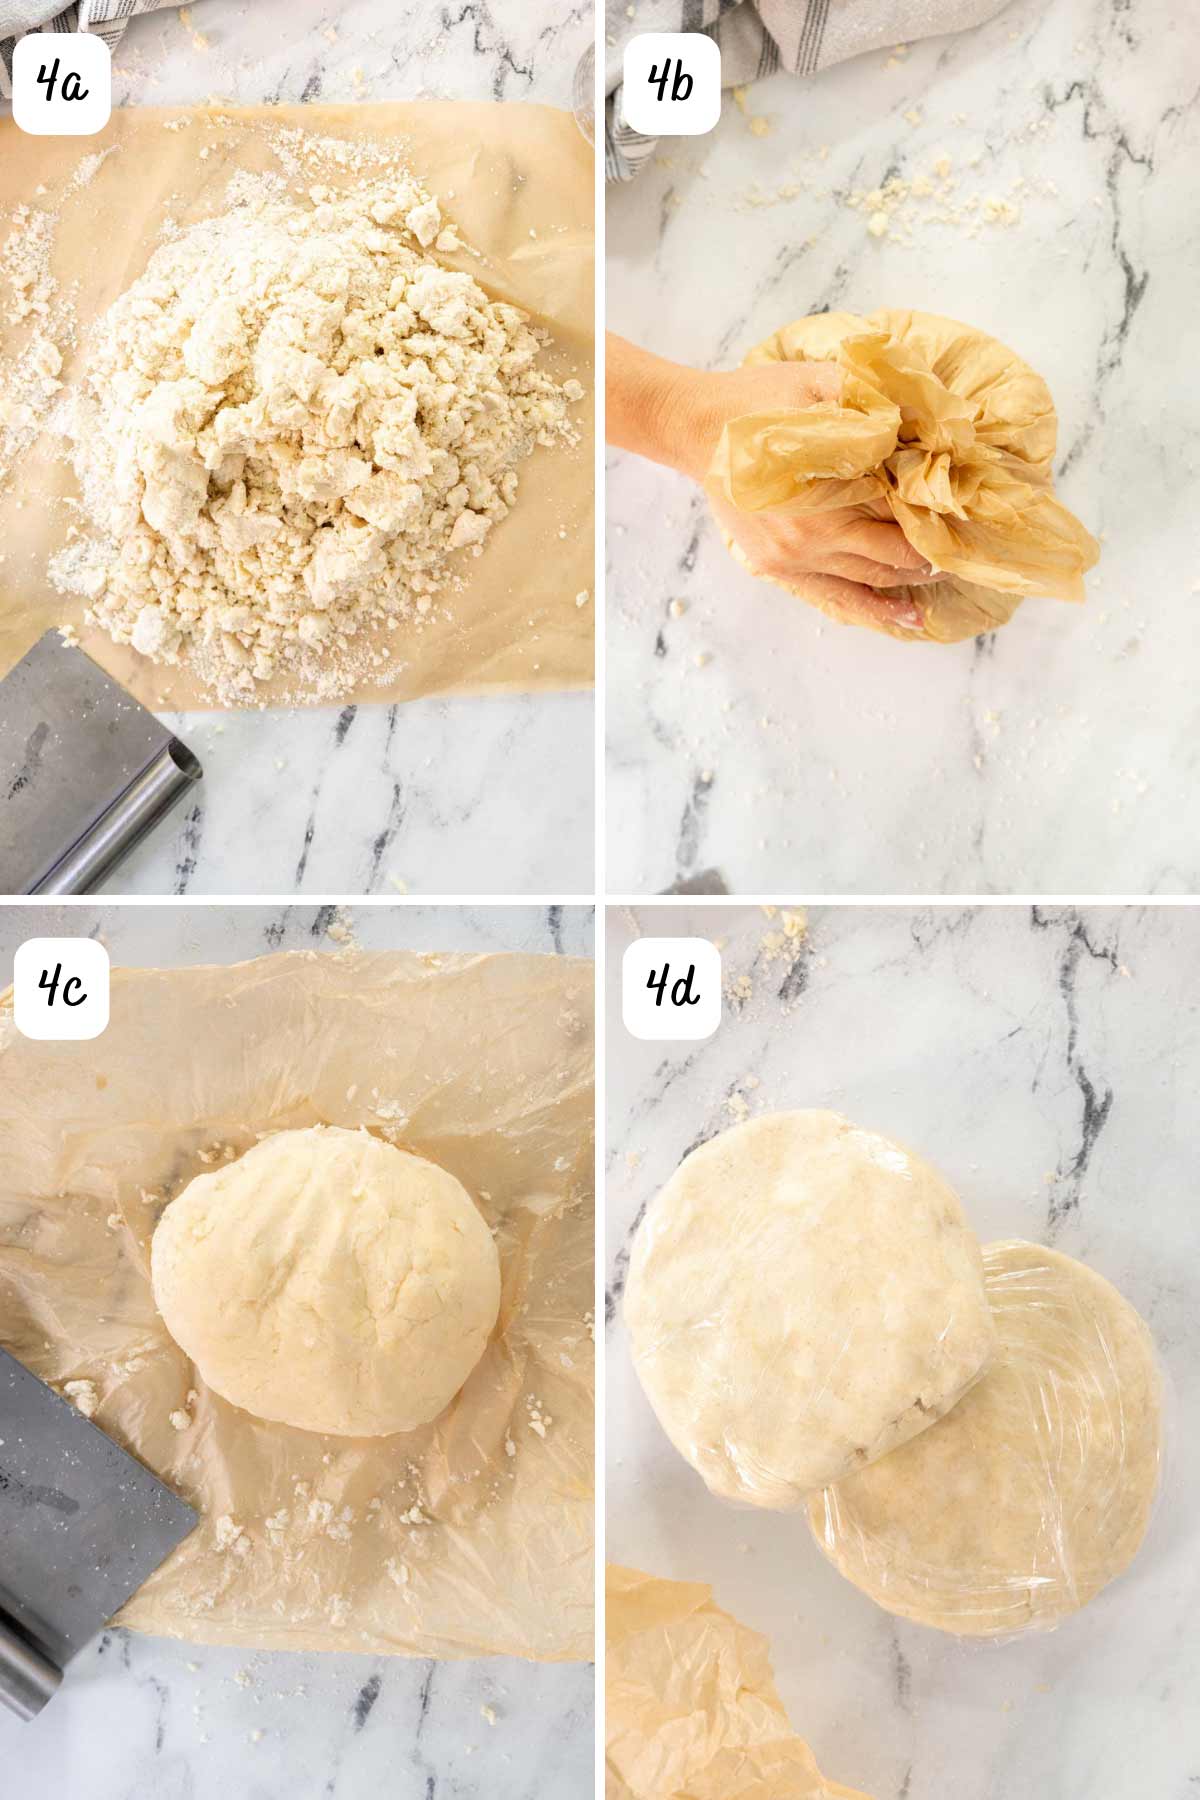
Dive the dough into two and flatten it into a round disc. Tightly cover with plastic or cling wrap.
Chill the pie dough for at least 30 minutes before rolling it out but 2 hours is better. This step is non-negotiable; it's the most crucial part of any pie crust recipe.
Once chilled you can roll out the dough according to your recipe instructions.
Roll Out the Dough
Deft, light strokes of the rolling pin and not too much flour on the board are the essentials. You can use white rice flour or more of your all-purpose blend for rolling out the dough.
I prefer to use a Silpat because it makes transferring the dough foolproof. You can also roll our between two pieces of parchment paper.
Place one dough disc on your floured surface. Roll quickly and lightly, always out from the center out. After every stroke, turn the dough to the right at 90 degrees.
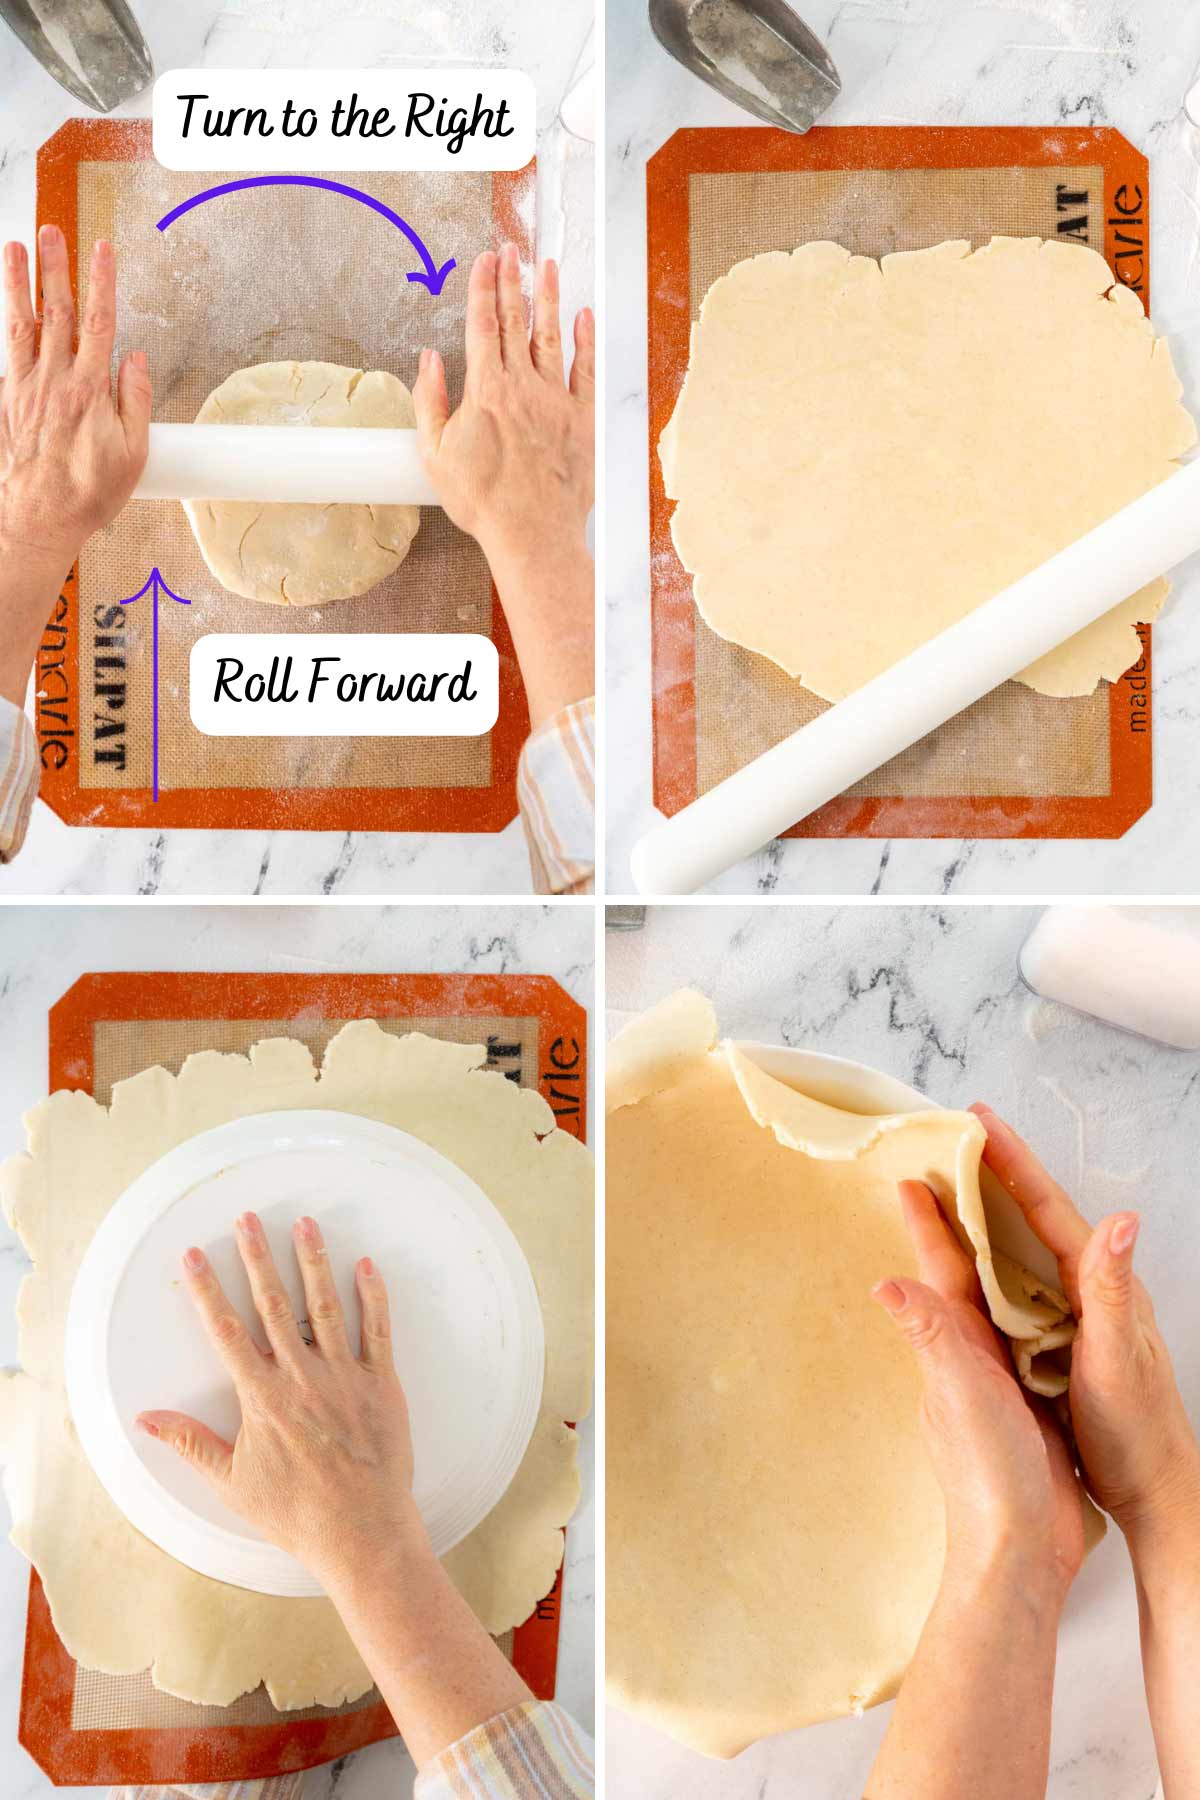
As the rolling pin approaches the edge of the dough on each stroke, the pin should be lifted and never rolled over the edge. This will make the edges too thin and cause them to crack.
The dough should be lifted frequently but never turned over during rolling. The final size should be 2 inches larger than your pie pan.
Gently move the dough to your pie pan. If you are using a rolling mat you can simply flip it over as shown below. Snuggly press the pie dough into the seam of the pan.
Pat the dough all over to push out any air bubbles.
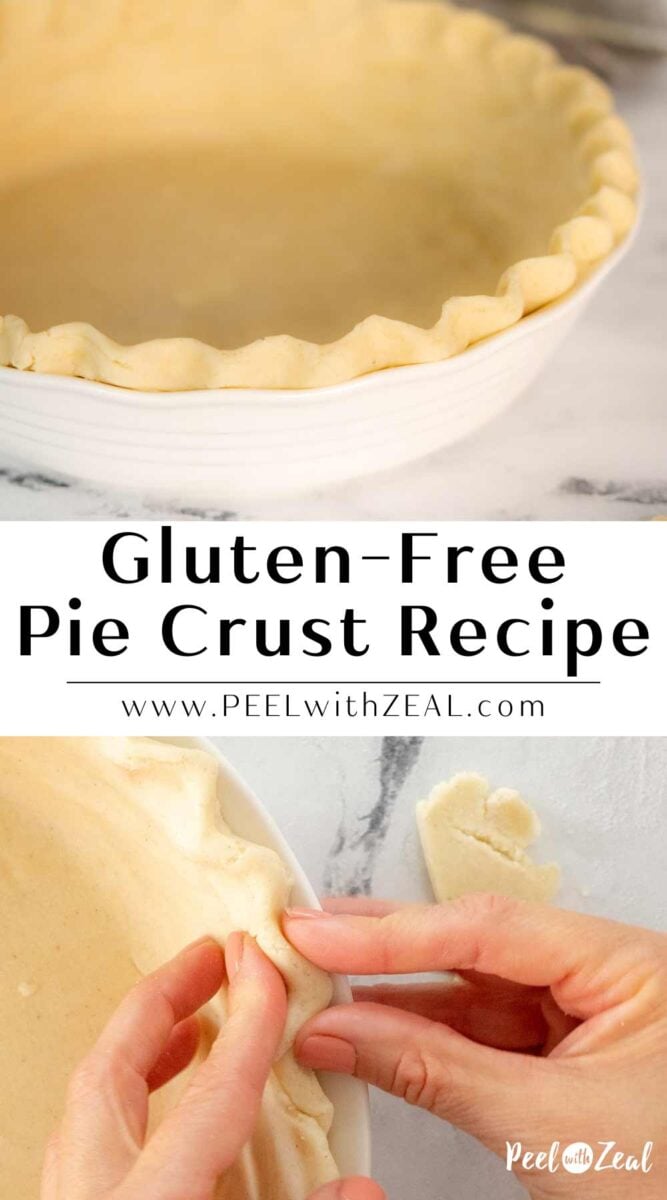
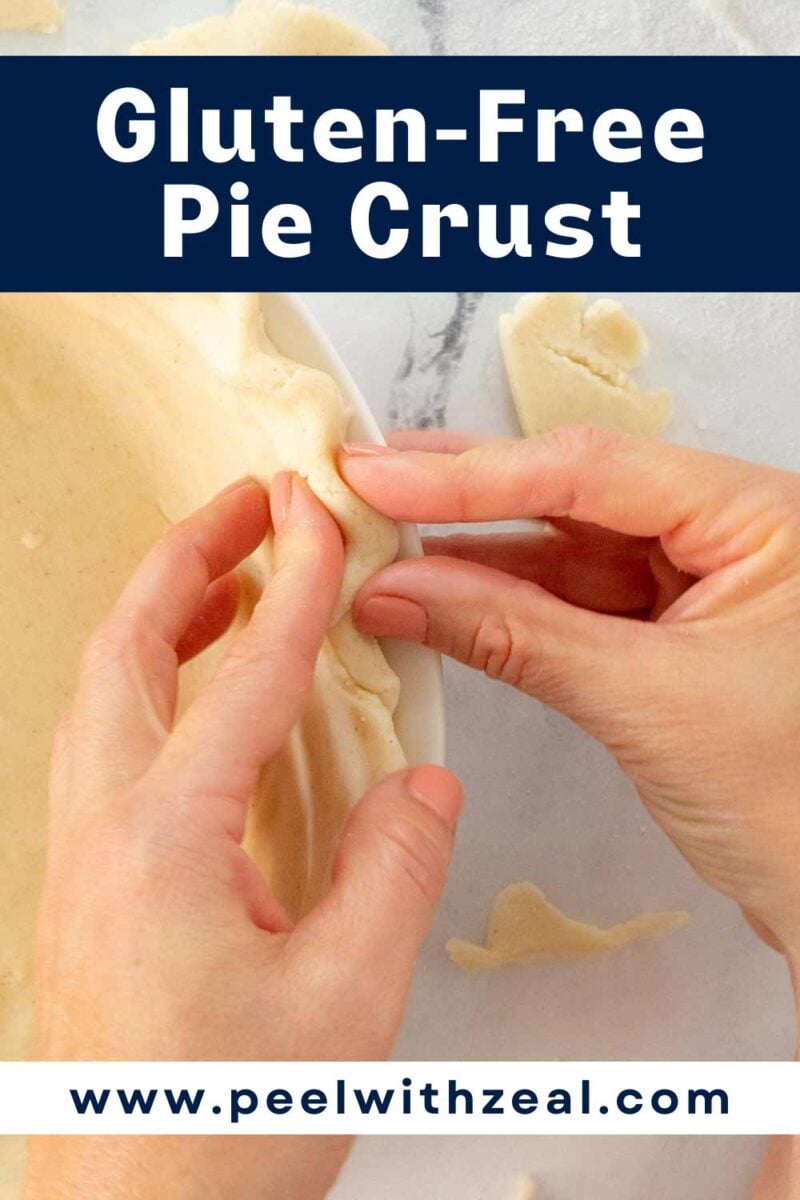
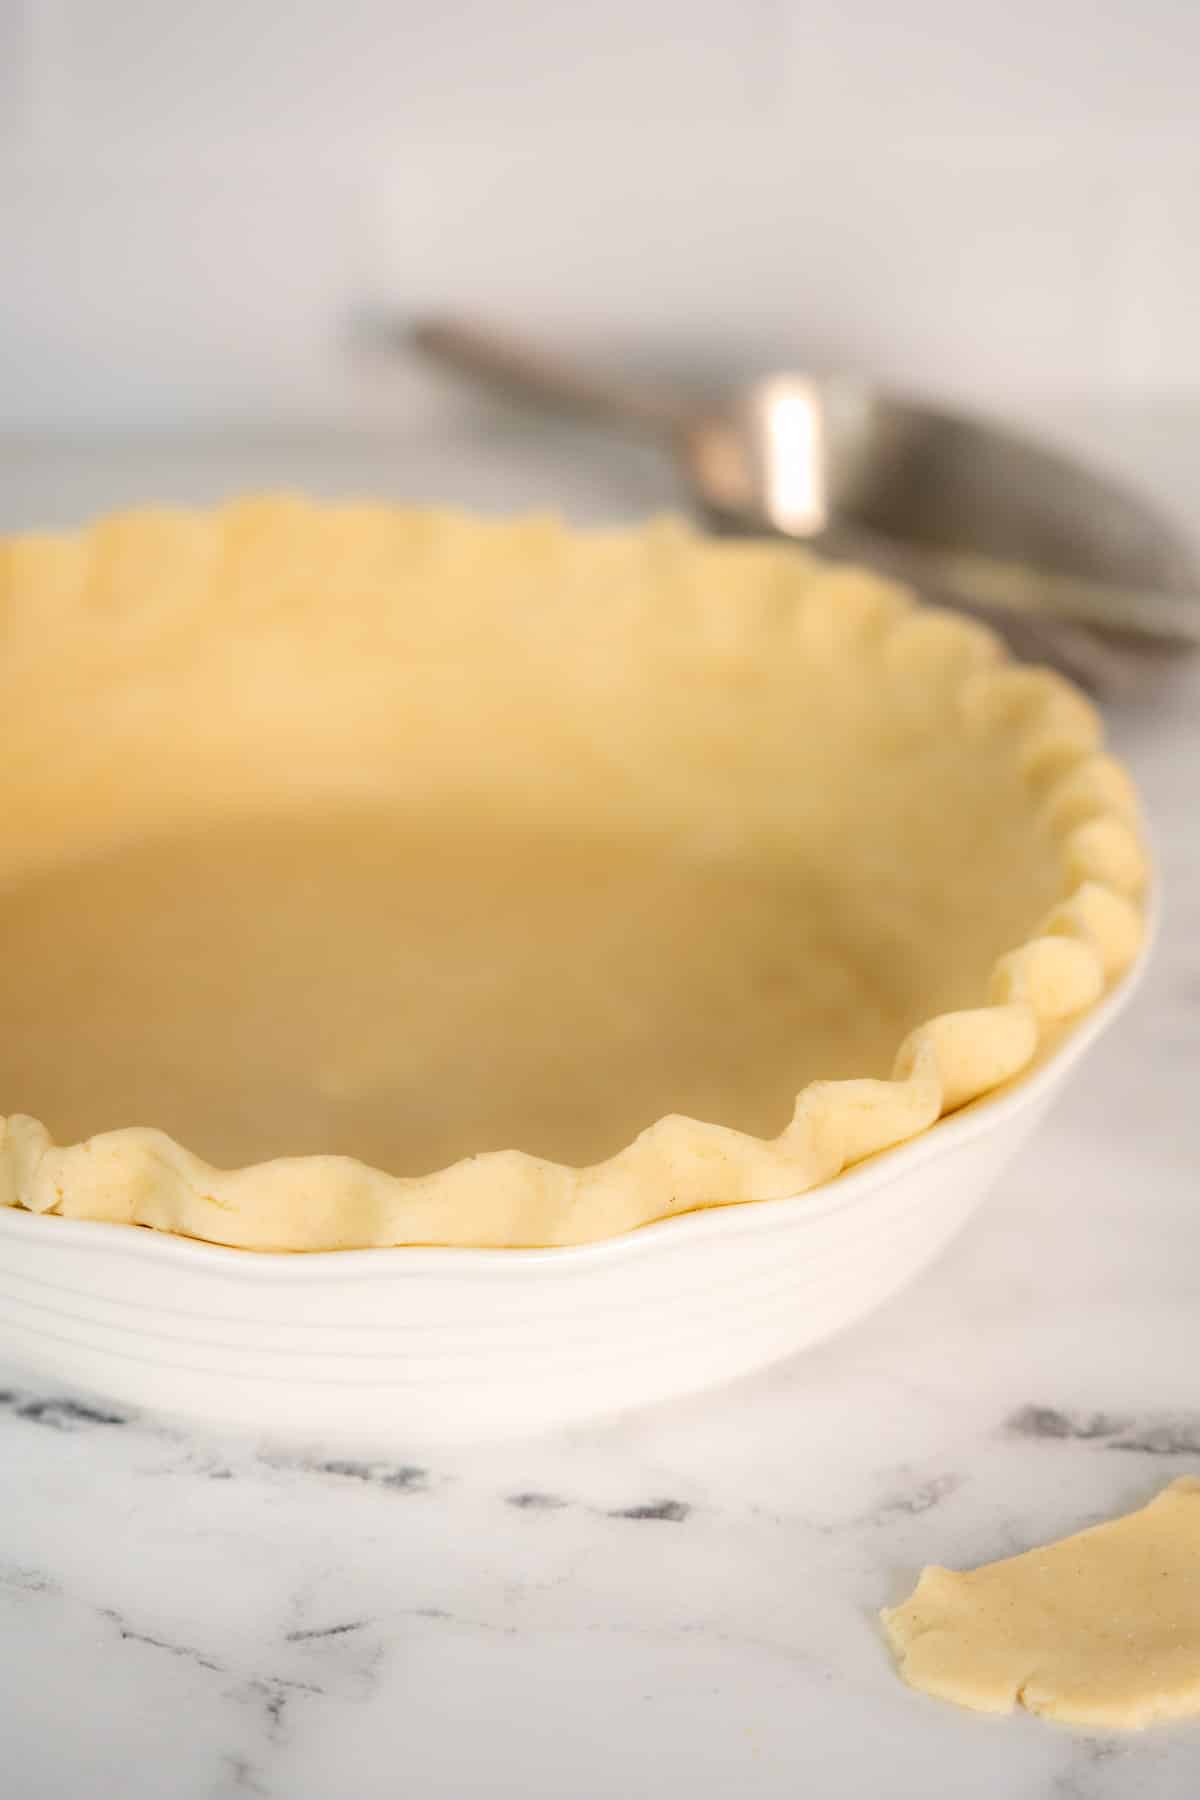
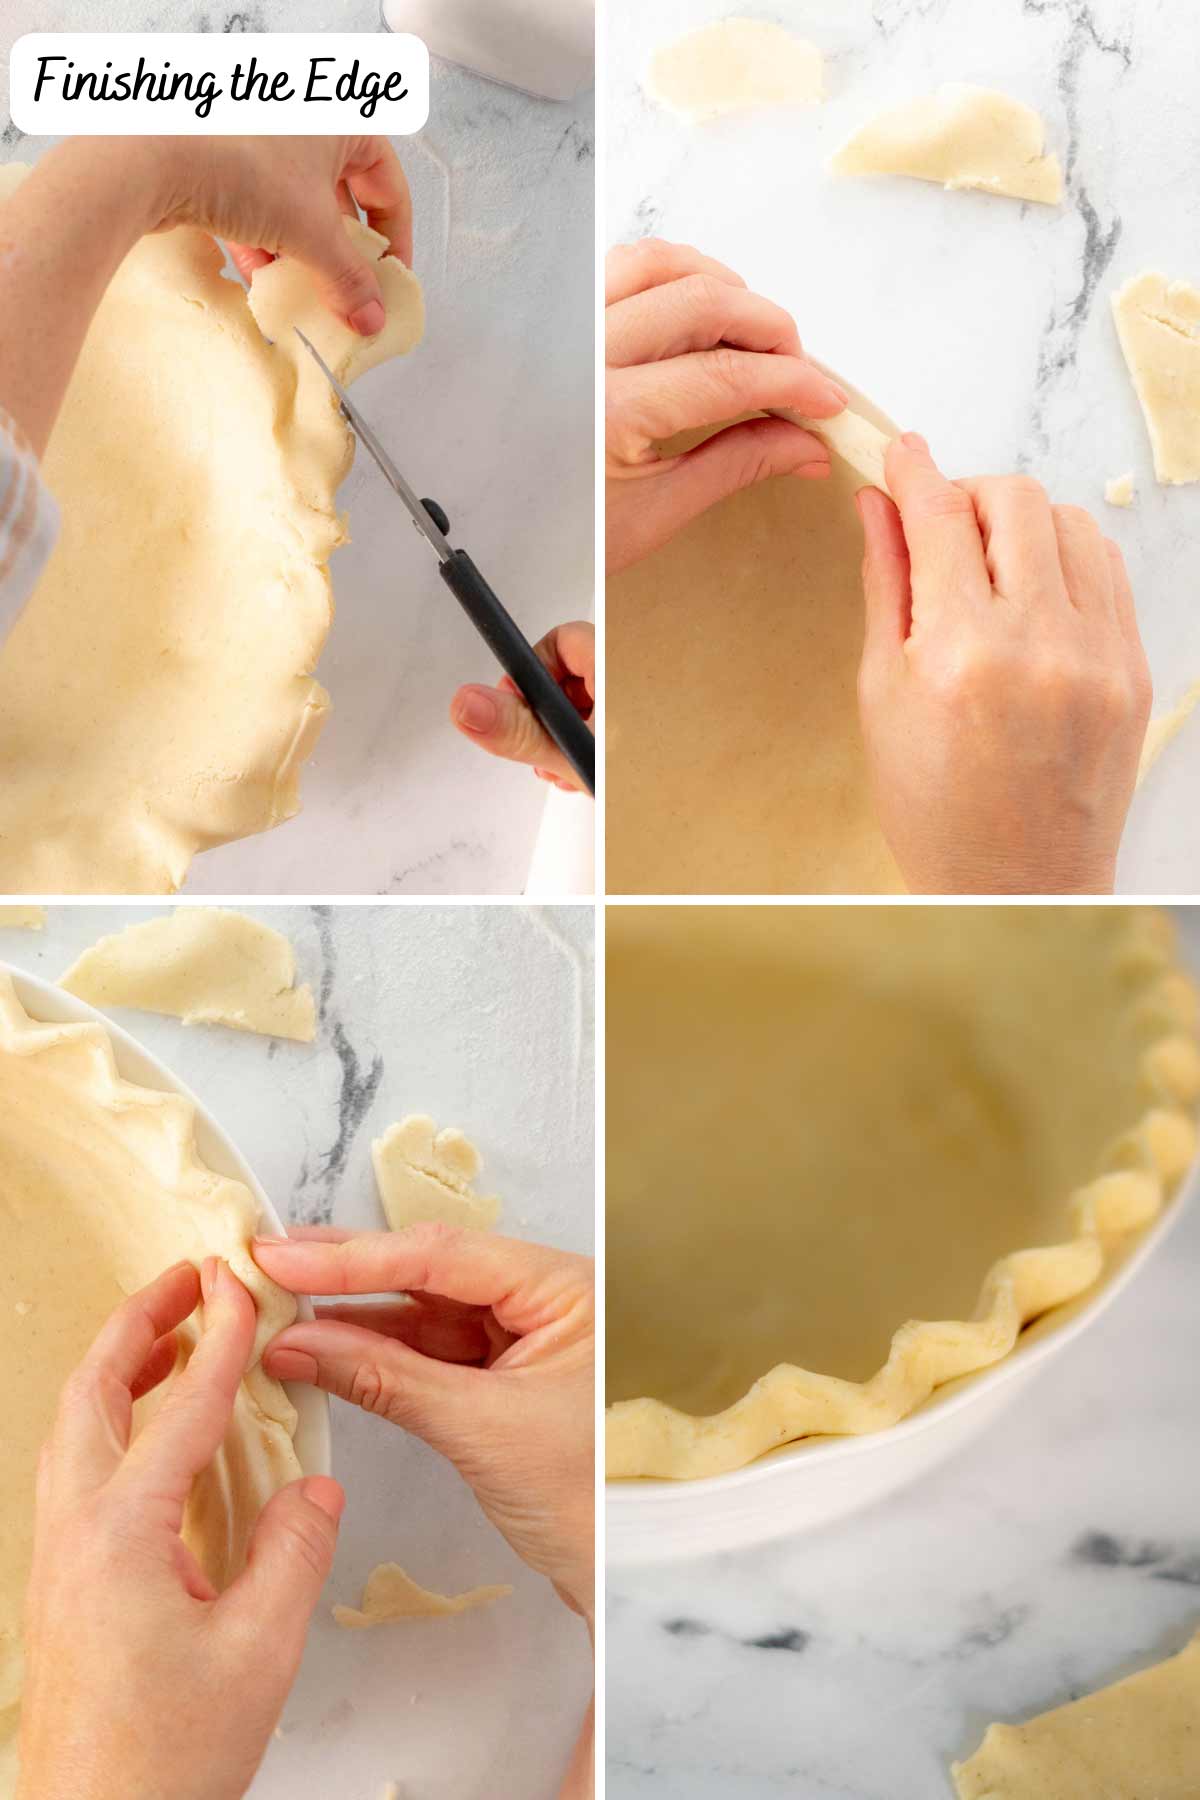
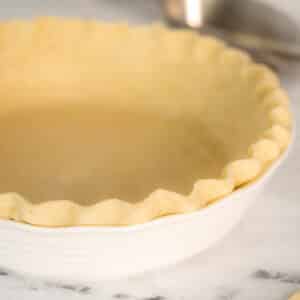
Finish the Edges
The classic edge for a single pie crust pie recipe is a crimped edge. Start by trimming the edge with scissors. Then fold a ½ inch of the edge under to make a standing rim.
Gently flute the edge using two fingers from one hand and one from the other.
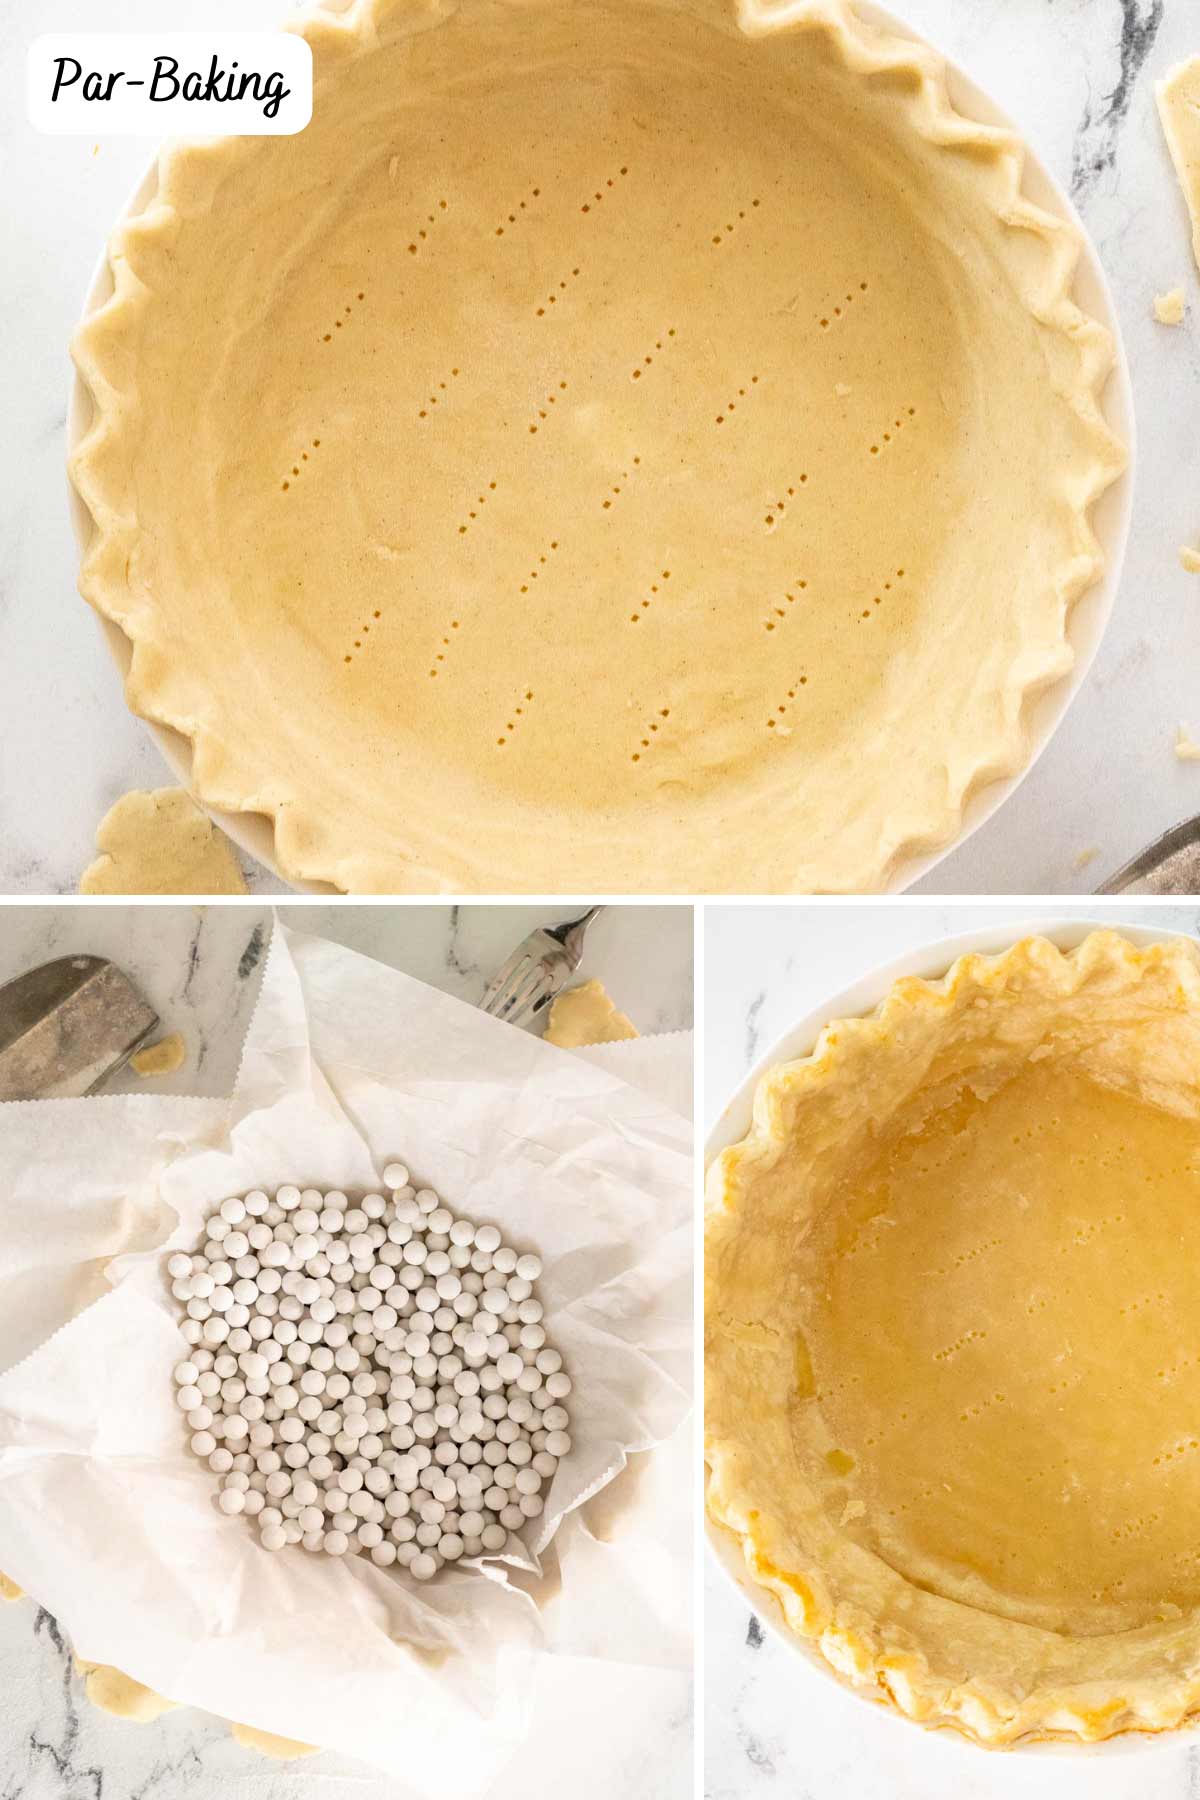
🥧How to Par-Bake Pie Crust
Par-baking is a useful technique where you partially bake the pie shell before adding the filling. A par-bake is used when the filling needs less time to cook than the crust or the filling is very wet. Think quiches and pumpkin pie here.
Start by docking the crust, meaning poke the bottom with a fork a few times. Then line the bottom with a sheet of parchment paper and fill the bottom with pie weights.
The weights keep the bottom from puffing up and docking the dough allows steam to escape.
Par bake a chilled pie crust for 12-15 minutes at 425 F degrees. Just until the edge of the crust just begins to turn golden brown. Remove from the oven and set aside to cool.
🥧How to Blind Bake a Pie
When doing a blind bake you want to ensure your recipe is only for a single-crust pie and it will not be cooked again later. Prepare your crust the same way as if you were going to partially blind bake.
Bake the pie crust at 425°F until the crust begins to turn golden between 17 to 20 minutes.
Remove the parchment and pie weights, and continue to bake another 8 to 10 minutes until the bottom of the crust is evenly browned and looks crisp.
👩🏻🍳 Troubleshooting
Your pie dough is crumbly which means rips and tears when you roll it out. This dough lacks moisture. Make sure you use enough ice water when preparing your pie dough. And always scoop your flour to ensure you haven't added too much.
Tough pie crust is the result of not enough fat in the crust, as well as overworking the dough. This recipe uses slightly more fat than the standard 3-2-1 pie ratio so follow the recipe and use the extra butter.
Additionally, don't work the dough too much by using our parchment paper twist method.
🌡️Make Ahead
This pie crust can be made up to 2 days in advance. After that, you need to freeze the pie crust.
Your unbaked crust can be frozen and stored for up to 3 months. Take your plastic-wrapped dough discs and place them in a zip-top freezer bag.
Thaw in the refrigerator overnight and then roll out and bake according to your recipe instructions.
One item of note is that frozen dough may be a bit tougher to work with then fresh dough. For that reason, if you are planning on doing any type of intricate design with the dough always use fresh.
Gluten-Free Pie Recipes


In addition to making pies, you can use the pie dough in place of the gluten-free crescent roll dough to make GF pigs in a blanket and gluten-free pizza pockets.
💬Frequently Asked Questions
Does gluten-free pie crust taste different?
When using butter, rather than lard or vegetable shortening, in your gluten-free pie crust there should not be any difference in taste.
Why does pie dough have to be chilled?
Butter has a high volume of water content and this water converts to steam as the pie dough bakes. The steam separates the crust into multiple flaky layers, making this the most delicious pie crust ever.
Can I freeze the dough?
Absolutely! Your unbaked crust can be frozen and stored for up to 3 months. Take your plastic-wrapped dough discs and place them in a zip-top freezer bag.
Thaw in the refrigerator overnight and then roll out and bake according to your recipe instructions.
Should you use an egg wash on gluten-free pie crusts?
My general rule of thumb on using an egg wash is to not use them on single-crust pies but I do use them on double-crust pies.
Did you enjoy making this recipe? Show it some love with ⭐⭐⭐⭐⭐ and leave a comment! Hungry for more FLAVORFUL recipes?
📖 Recipe Card
Flaky Gluten-Free Pie Crust with Sour Cream
Ingredients
- 2 ¾ cups gluten free flour blend
- 1 Tablespoon granulated sugar omit for savory recipes
- 1 teaspoon dry milk powder
- 1 teaspoon salt
- ¼ teaspoon baking powder
- ½ teaspoon xanthan gum omit if your blend contains
- 5 Tablespoons ice water
- 3 Tablespoons sour cream
- 1 Tablespoon apple cider vinegar
- 17 Tablespoons unsalted butter cold, cut into ½ inch dice
Instructions
- Combine ice water, sour cream, and vinegar in a chilled bowl. Whisk to combine.5 Tablespoons ice water, 3 Tablespoons sour cream, 1 Tablespoon apple cider vinegar
- Combine dry ingredients in a food processor until combined, 5 pulses.2 ¾ cups gluten free flour blend, 1 Tablespoon granulated sugar, 1 teaspoon dry milk powder, 1 teaspoon salt, ¼ teaspoon baking powder, ½ teaspoon xanthan gum
- Sprinkle butter over the top of the flour in the bowl of the food processor. Pulse until you get large pea sizes pieces. about 10 to 12 pulses.17 Tablespoons unsalted butter
- Turn on the food processor and start slowly pouring the water-sour cream mixture. You might not need all the mixture. Once the dough becomes shaggy and just starting to come together it is ready.
- Turn out the dough and form it into a ball. Divide in half and press into 2 flat discs. Individually wrap in plastic wrap and chill for at least 30 minutes but 2 hours is better.
- Roll out the pie crust and bake according to your recipe.
Video
Notes
Gluten-Free Pie Crust Tips
- You may not need all the water mixture. If you need more just use ice water.
- For the chilled water do not use straight water. Instead, fill a glass with ice and water. Use this to measure out the cold water.
- Use as little flour as possible for rolling out the dough. You can roll it out on parchment paper or a Silpat, if needed.
Equipment
Nutrition
🔪Equipment Notes
- Pastry cutter - As mentioned as I have improved my gluten-free baking skills I have moved from a food processor to an old-fashion pastry blender.
- Pastry mat - I prefer rolling pie dough out on a lightly floured pastry mat or Silpat. Gluten-free pie crust is stickier than traditional
- Rolling pin - An obvious need but I prefer a large flat one because I can use it for pizza too.
- Pie plate - While metal is the best conductor of heat most home bakers prefer to use a glass or pyrex pie dish so they can see the bottom.
Not required, but nice to have items:
- Pastry wheel -Helpful if you want to make decorative pies.
- Pie weights - If you're an avid baker invest in pie weights, otherwise use dried beans.
- Pie crust shield -You can use aluminum foil to make your own collar. But again. If you are baking pies more than once or twice a year I highly recommend it.
This recipe was adapted from the America's Test Kitchen all-butter-pie pie crust recipe.
Comments
No Comments