
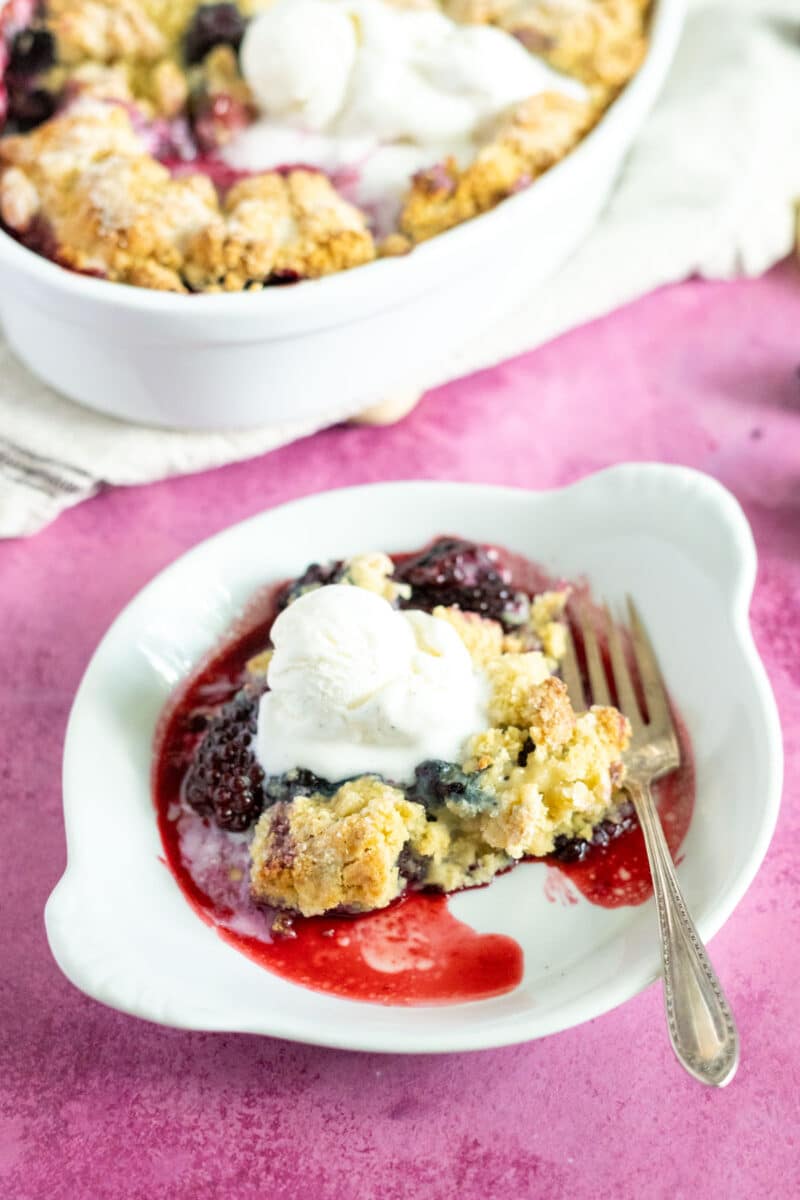
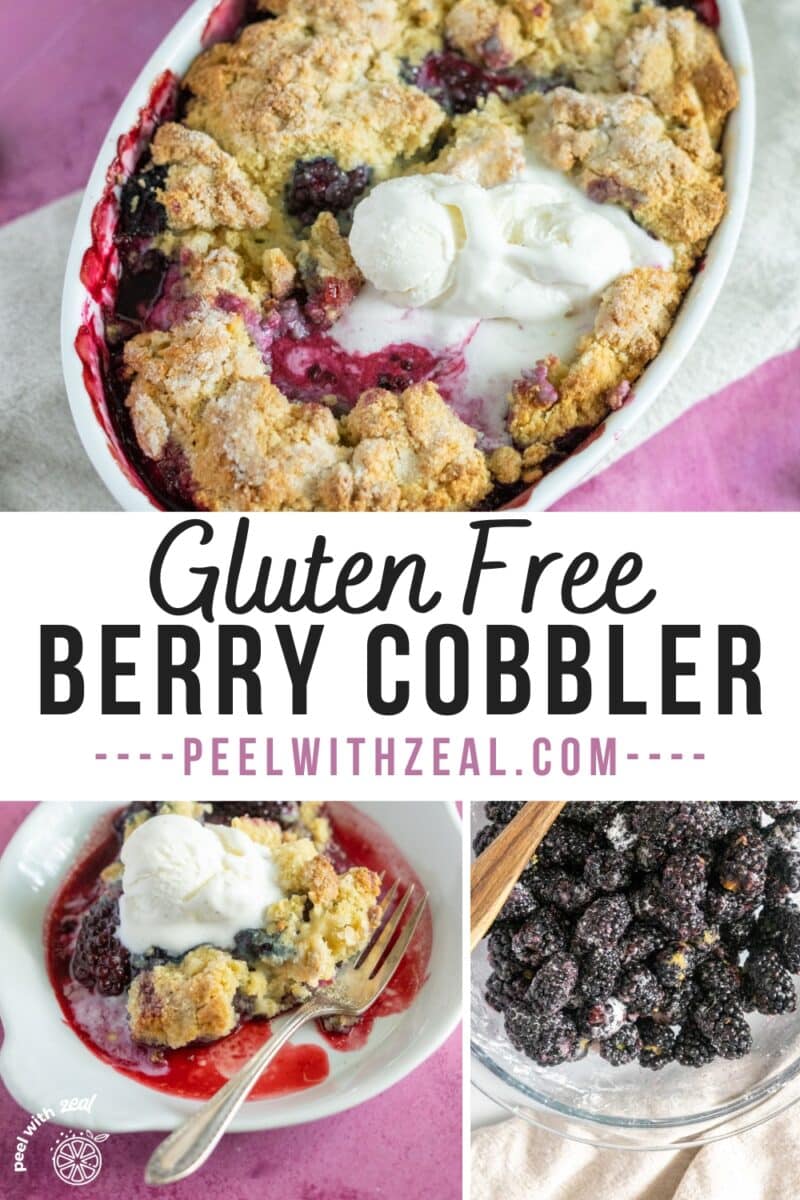
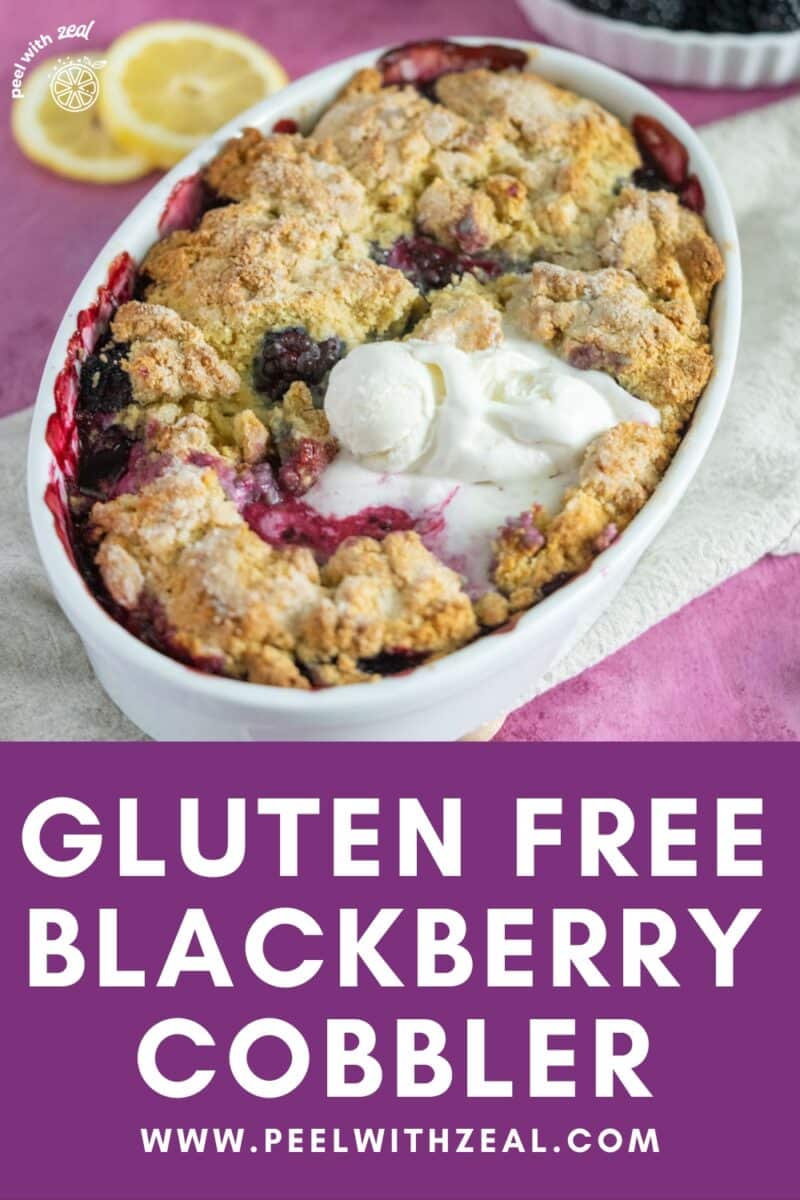
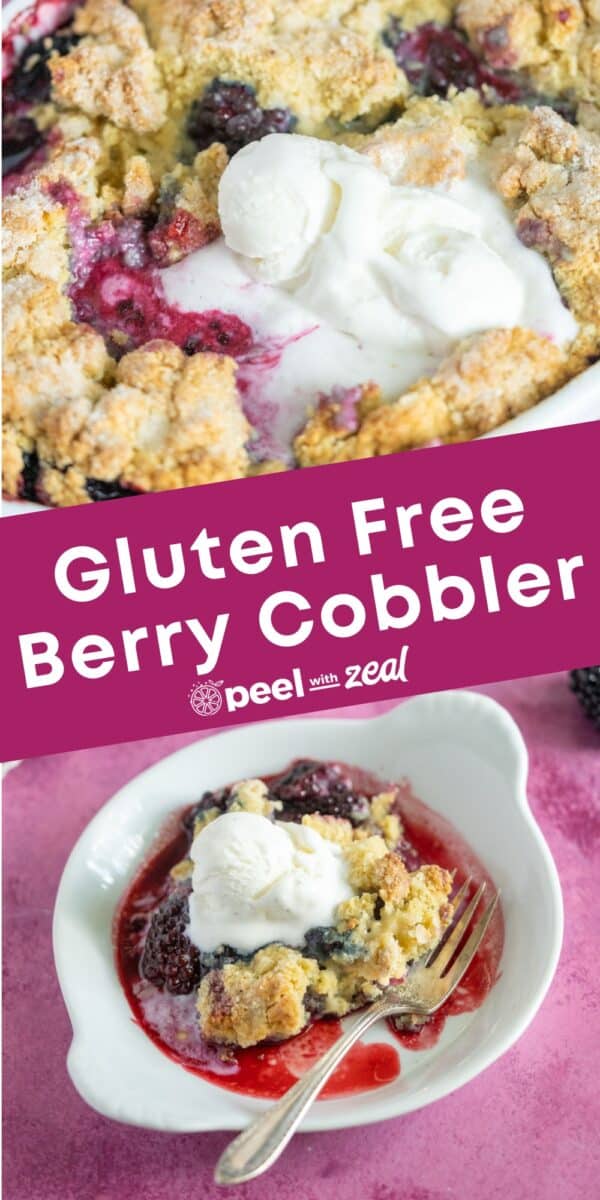

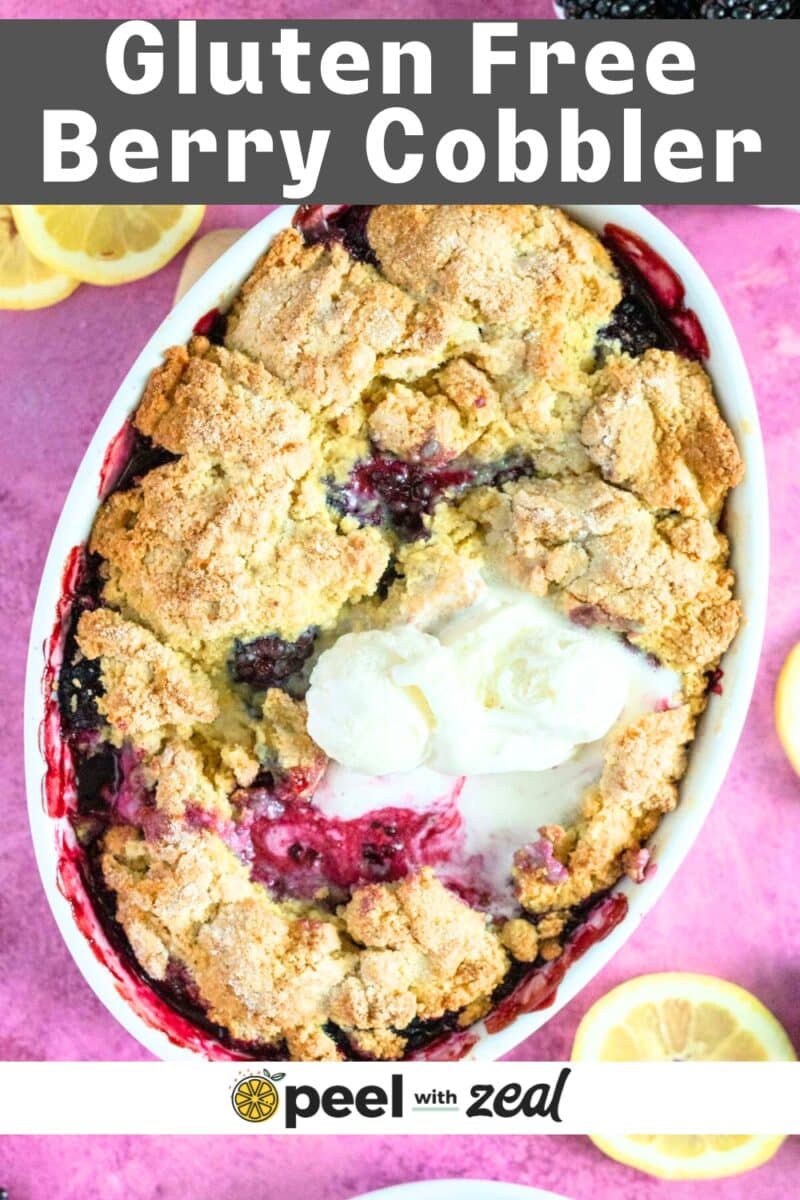
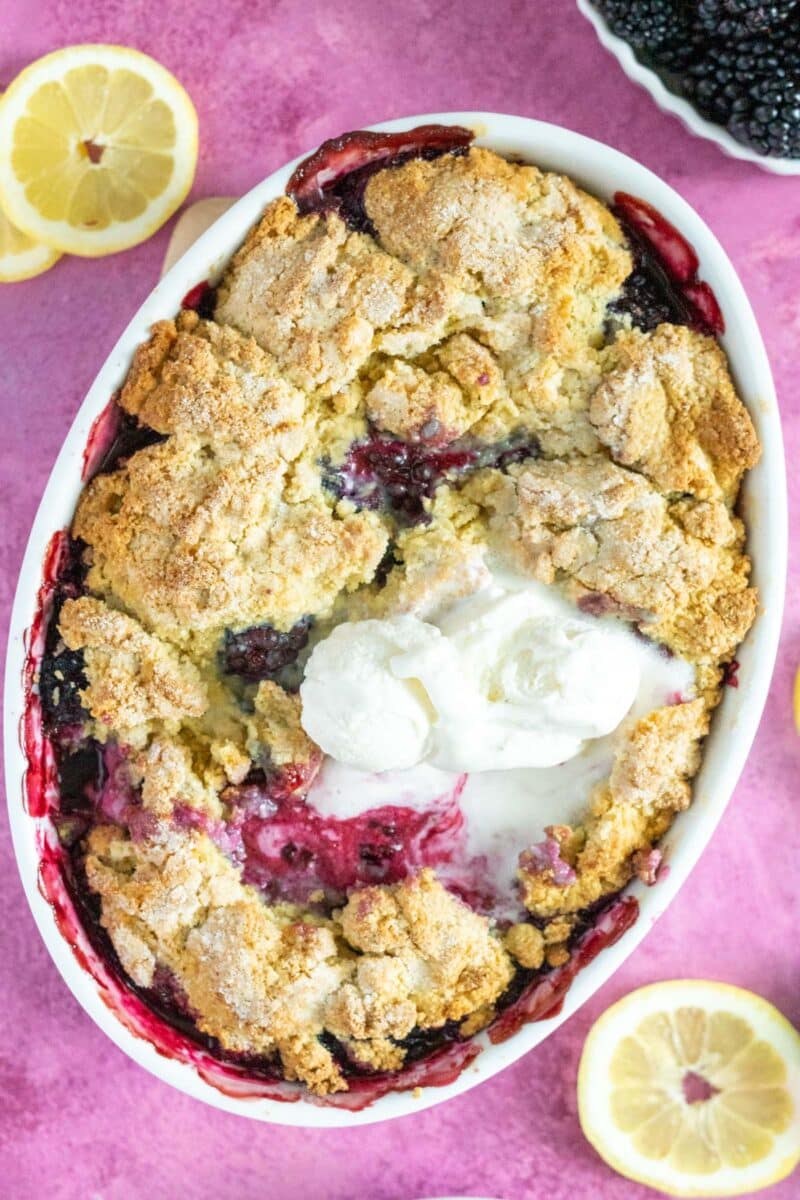
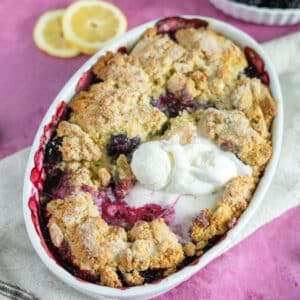
This Gluten-Free Blackberry Cobbler is the best easy summer dessert. It's made with tart, juicy blackberries topped with a buttery, flaky biscuit topping. This old-fashioned summer dessert is going to be a potluck staple in your house.

WANT TO SAVE THIS RECIPE?
This post may include affiliate links. Please read my disclosure policy.
Berry cobblers are the epitome of summer. Along with tomato salads, grilled corn, and backyard burgers, of course. Fresh berries baked into a thick, gooey, sweet filling topped with a thick batter that transforms into a flaky, buttery, doughy biscuit-like crust?
I mean, I can't think of anything that sounds better than that on a summer day. Especially if it's served with a scoop of my favorite ice cream.
This berry cobbler is just like your traditional blackberry cobbler recipe, but made gluten-free! It's made completely from scratch but requires just 20 quick minutes of prep. It's quick and easy, so incredibly tasty, and pretty much the perfect dessert.
📖Why My Recipe Works
- Well-Tested- This recipe is made with many ingredients you probably already have in your kitchen. I got so much amazing feedback on the cobbler topping on my GF apple cobbler that I decided to keep it the same. The topping has an egg yolk that adds extra moisture that gluten-free baked goods always need.
- Lemon- This recipe also utilizes lemon, both the zest and the juice, to keep the berry flavor bright. It doesn't necessarily have a strong lemon taste but when I left it out I noticed the berries didn't quite have the same pizazz.
🧾Ingredient Notes
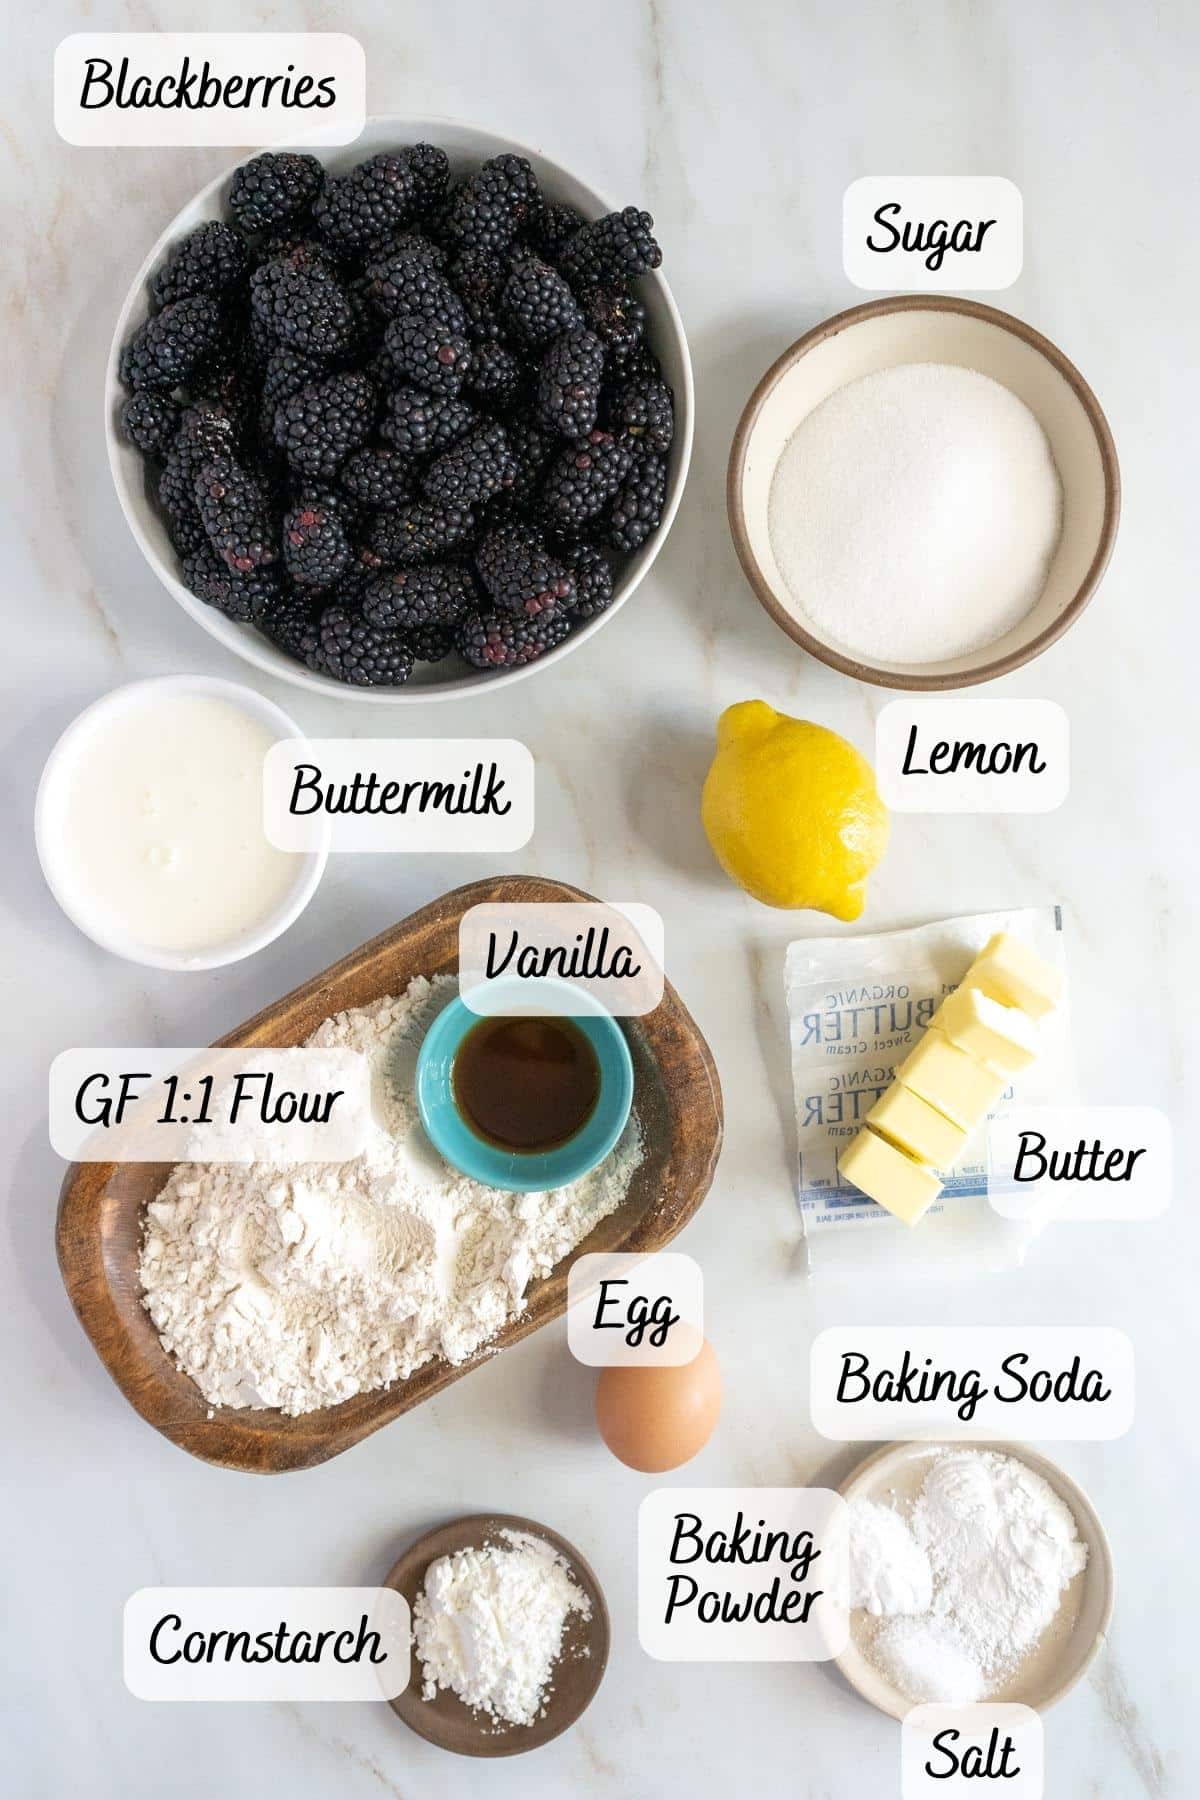
Blackberry Filling
- Blackberries - Fresh blackberries if you can but frozen berries will work. You can use this recipe with ant mix of berries.
- Sugar - I use granulated sugar to sweeten the filling.
- Lemon - We're brightening the flavor of the filling up a little bit with both lemon zest and juice.
- Cornstarch - Thickens the fruit juices to achieve that delicious gooey texture. You can also use potato starch or arrowroot powder using a 1:1 ratio.
- Salt - Cuts the sweetness of the fruit and sugar.
Biscuit Topping
- Flour - Use a gluten-free all-purpose flour blend of your choosing. Don't use a single gluten-free flour, such as coconut flour or tapioca flour. The texture will not be the same.
- Xanthan Gum - This is only needed if the gluten-free flour blend you use doesn't already contain it. Check the label to make sure.
- Sugar - I use granulated sugar, but coconut sugar will work as well.
- Baking Powder and Baking Soda - Keep the biscuit topping light and fluffy.
- Butter - You'll need cold, cubed butter to create a flaky, airy texture. I recommend using unsalted so that you can control the saltiness of the topping. If all you have is salted butter, omit the salt in the recipe.
- Buttermilk - Make sure the buttermilk is nice and cold for the perfect texture.
💭 Dairy-Free Variation
To make a dairy-free cobbler, replace the butter with vegan butter and the buttermilk with equal parts nondairy milk and 1 tablespoon lemon juice and a ¼ teaspoon cream of tartar. I like almond milk or macadamia nut milk in my cobblers.
With these modifications, you can also make the cobbler vegan. Simply leave out the egg yolk. It's just extra moisture, but you may add a tablespoon of apple sauce or more nondairy milk if you want.
⏲️How to Make Gluten-Free Cobbler
Make the Filling
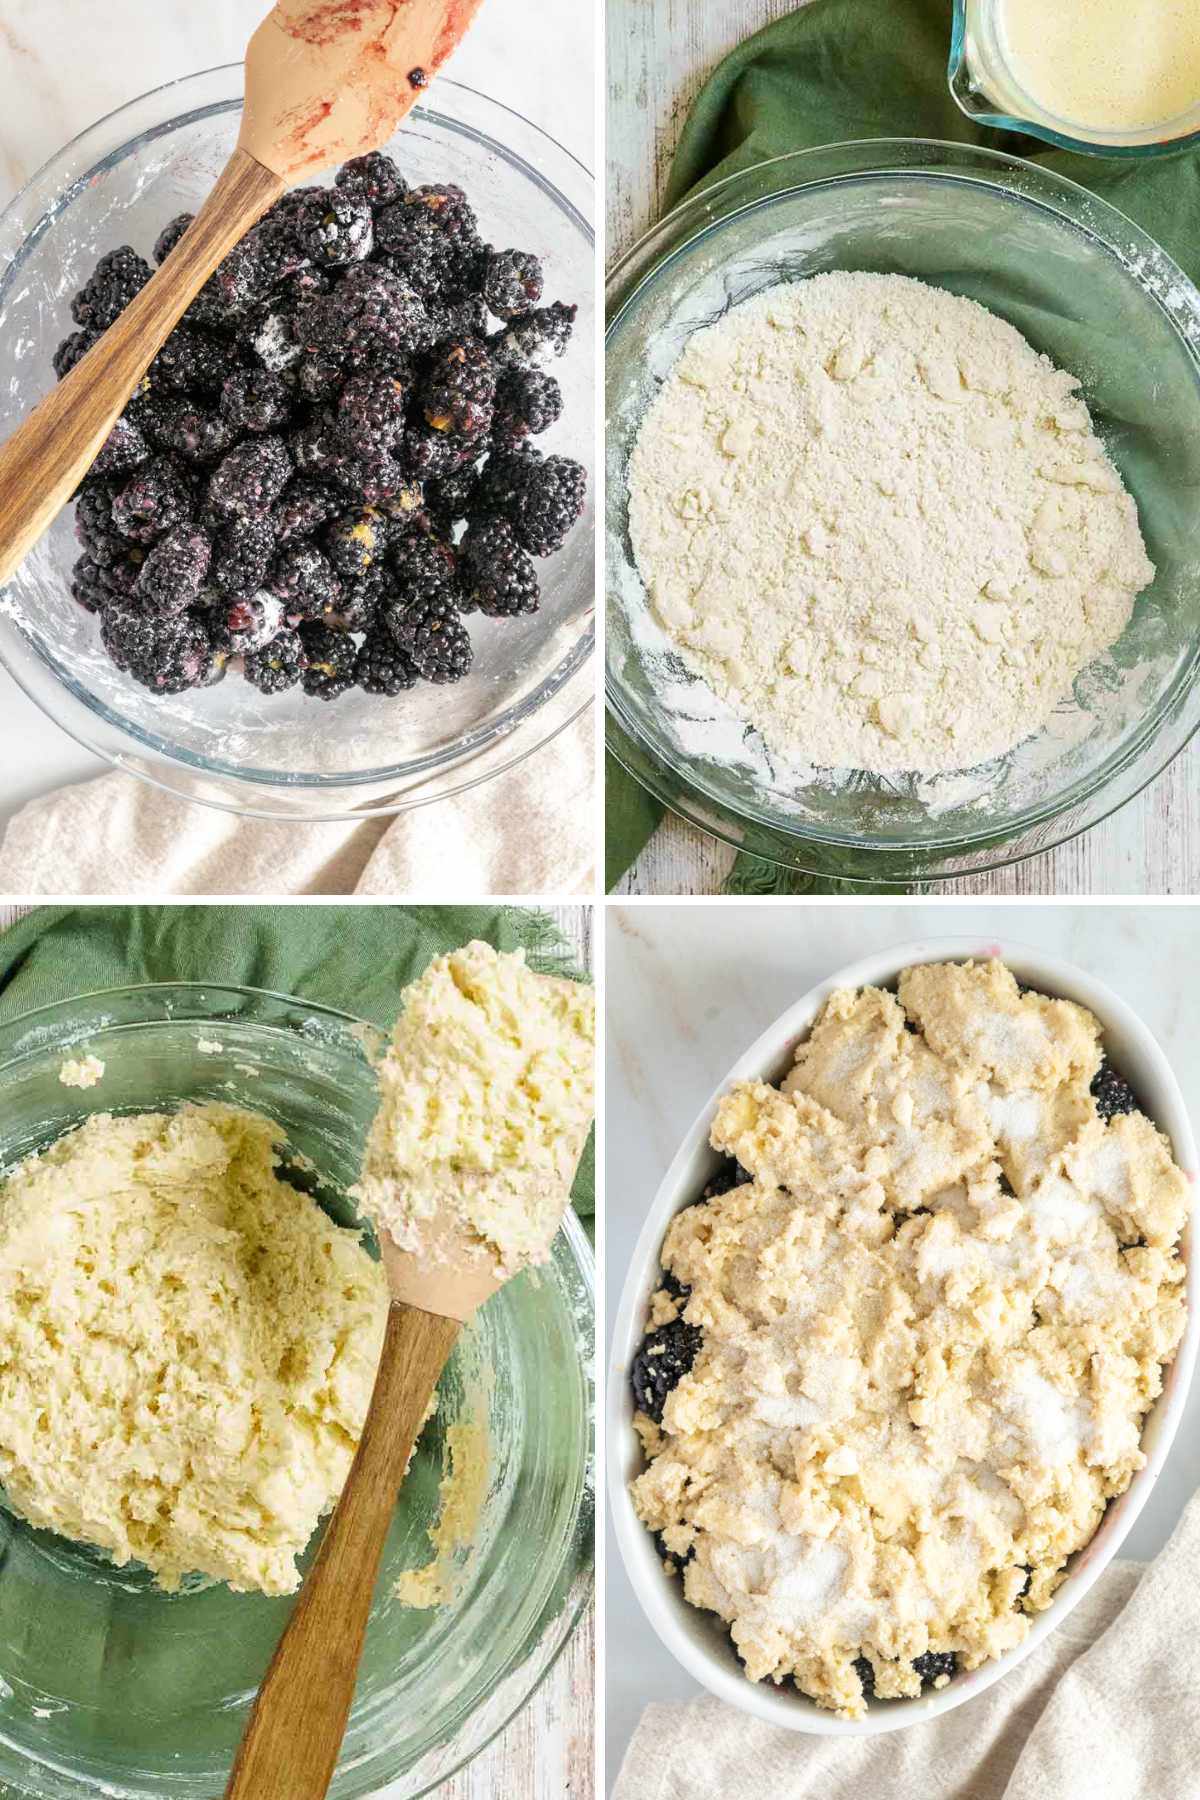
In a bowl, mix together the berries, sugar, lemon juice, zest, cornstarch, and salt. Toss well to make sure that the berries are evenly coated in the rest of the mixture. Transfer the filling to a lightly buttered or greased baking dish, then spread it into an even layer. You can also use a cast-iron skillet for this recipe.
Make the Topping
In a large bowl, combine the dry ingredients. After that, cut in your butter. The butter should be extremely cold. Try popping it in the freezer for 10 minutes before adding it in.
Normally, a pastry blender would be required for this, but I find that cutting in the butter with two forks works just as well. Mix in the buttermilk and egg yolk once the crumbs are pea size. I usually combine the egg yolk and buttermilk in a measuring cup and give it a quick stir. It will be easy to incorporate into the batter.
Stir slowly until the liquid is mixed, then set aside for 10 minutes. Spoon the batter over the blackberries. The filling does not have to be completely covered. A little peak of the bright purple filling is what makes cobblers unique.
Like with most gluten-free baking recipes, you need to let the flour hydrate properly before baking. This will prevent it from being too dry.
Assemble and Bake
Once the dough is ready, use a spoon to scoop the dough all over the top of the berry mixture. Make sure that it is (mostly) covered. There will still likely be little bits of the fruit showing through.
Optionally, sprinkle a little bit of sugar over the top of the batter. This isn't necessary but does give it a tasty crunch. Bake the cobbler in the oven at 350ºF until the cobbler is golden brown and the fruit filling is heated all the way through.
For me, the bake time is usually between 40 and 45 minutes. If you notice the cobbler topping browning a little bit too much before the center is heated, cover the baking dish with foil and continue to bake.
Before serving, let the cobbler cool for 10-15 minutes. This not only prevents you from burning your mouth, but also gives the fruit filling time to thicken up. Top with homemade whipped cream or a big scoop of vanilla ice cream.

👩🏻🍳Jen's Top Tip
Place your baking dish on a sheet pan or a piece of foil. This will catch any of the blackberry filling that bubbles over and prevent it from burning on the bottom of your oven.
Did you enjoy making this recipe? Show it some love with ⭐⭐⭐⭐⭐ and leave a comment! Hungry for more FLAVORFUL recipes?
📖 Recipe Card
Gluten-Free Blackberry Cobbler
Ingredients
Blackberry Filling
- 6 cups blackberries use fresh or frozen
- ⅓ cup granulated sugar
- 1 lemon zest only
- 1 Tablespoon lemon juice
- 1 Tablespoon cornstarch
- ⅛ teaspoon kosher salt
Biscuit Topping
- 1 ½ cup gluten-free flour blend
- ¼ xanthan gum omit if your flour blend contains
- ⅓ cup granulated sugar
- 2 teaspoons baking powder
- ½ teaspoon baking soda
- ½ teaspoon salt
- 6 Tablespoons unsalted butter cold and cubed
- ¾ cup buttermilk cold
- ½ teaspoon vanilla extract
- 1 egg yolk
Instructions
- Preheat your oven to 350 F degrees. Lightly butter or oil your baking dish.
- In a large bowl, combine the berries and the remaining filling ingredients. Toss until the berries are evenly coated. Transfer the mixture to the prepared baking dish and pat into an even layer.6 cups blackberries, ⅓ cup granulated sugar, 1 Tablespoon lemon juice, 1 Tablespoon cornstarch, ⅛ teaspoon kosher salt, 1 lemon
- Whisk the flour, sugar, baking powder, baking soda and salt together in a large bowl. Using two forks (or a pastry cutter) cut in the butter until you have pea-sized crumbs.1 ½ cup gluten-free flour blend, ¼ xanthan gum, ⅓ cup granulated sugar, 2 teaspoons baking powder, ½ teaspoon baking soda, ½ teaspoon salt, 6 Tablespoons unsalted butter
- Whisk together the egg yolk, vanilla, and buttermilk. Slowly add the mixture to the flour and stir with a rubber spatula until evenly combined. Rest the dough for 10 minutes.¾ cup buttermilk, 1 egg yolk, ½ teaspoon vanilla extract
- Spoon the dough all over the top of the filling. The filling should be mainly covered with some bits of filling showing through. Optional: Sprinkle extra sugar over the top.
- Bake uncovered until the fruit is bubbling and the top is golden, about 40 to 45 minutes. If it looks like it's getting too brown, cover it loosely with aluminum foil. Cool for 10 to 15 minutes before serving.
Notes
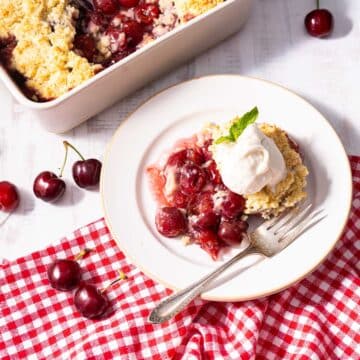
- You can use any blend of berries including strawberries, raspberries, and blueberries.
- To make ahead fully bake and cool before storing in the fright. Reheat at 300 F degrees until warmed through.
- See post for dairy-free substitutions.
- Leftover berry cobbler can be stored in an airtight container in the fridge for 4-5 days.
Equipment
- Baking dish
Nutrition
More Gluten-Free Summer Desserts

Common Recipe Questions
The difference is not so much in the filling as it is in the crust/topping.
A blackberry pie is made with a berry filling baked in a traditional pie crust. A blackberry cobbler is made with a berry filling that's layered with a biscuit dough topping (similar to Bisquick). In a cobbler, the "crust" is on top!
You don't! Whether the berries are fresh or frozen, there is really no prep needed beyond washing them before you incorporate them into the filling.
The biscuit topping is naturally going to soften up as it sits in the fridge. There is, unfortunately, no perfect way to keep it as golden and crispy as it is fresh out of the oven.
You can, however, warm the cobbler in the oven rather than the microwave when you're ready to serve it again. The microwave will make it soggy, while the high heat of the oven will help re-crisp the top of the biscuit layer.
Aphrodite says
Yummy and delicious
Kim says
First, thank you for putting the ingredients under the instructions...so helpful for my ADD self who likes to look ahead, lol. Easy to follow. I added brown sugar to the top