
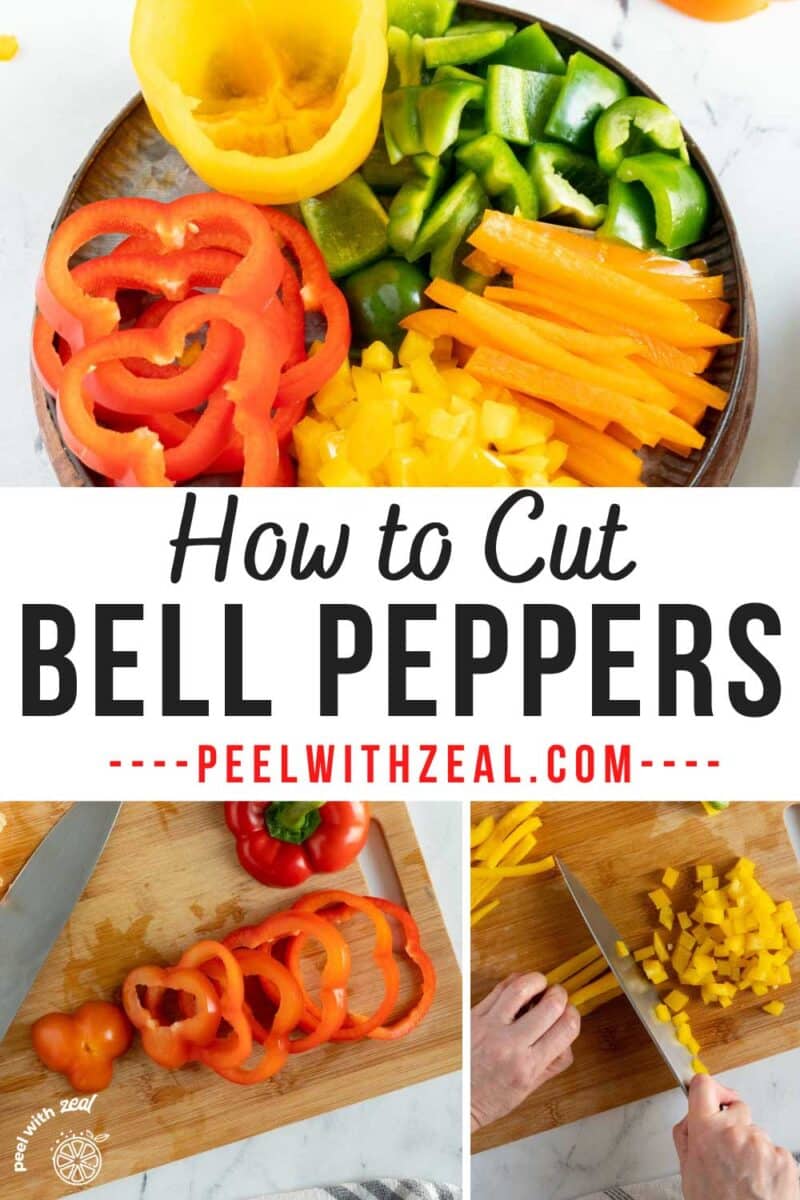
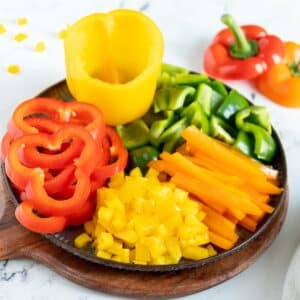
The right way to cut fresh bell peppers depends on the dish you are making. We are going to show you 5 different ways to cut bell peppers for your favorite dishes using easy-to-follow instructions and step-by-step pictures.
WANT TO SAVE THIS RECIPE?
This post may include affiliate links. Please read my disclosure policy.
This post is part of our knife series where we are teaching you the best way to cut fruits and vegetables for all your favorite recipes. You can find all our how-to posts in our Kitchen Basics Series.
The most common mistake when cutting peppers is to hold the stem end and cut it downwards to make 4 sections. This wastes a lot of pepper flesh. Try the julienne method instead!
🔪How to Cut Bell Peppers
You only need a sharp knife nonserrated and a cutting board.
The most stable way to hold your knife in your dominant hand. Grip the handle with your thumb and index finger on either side of the blade. Place your middle finger on the back of the handle, near the blade, to provide additional support and control.
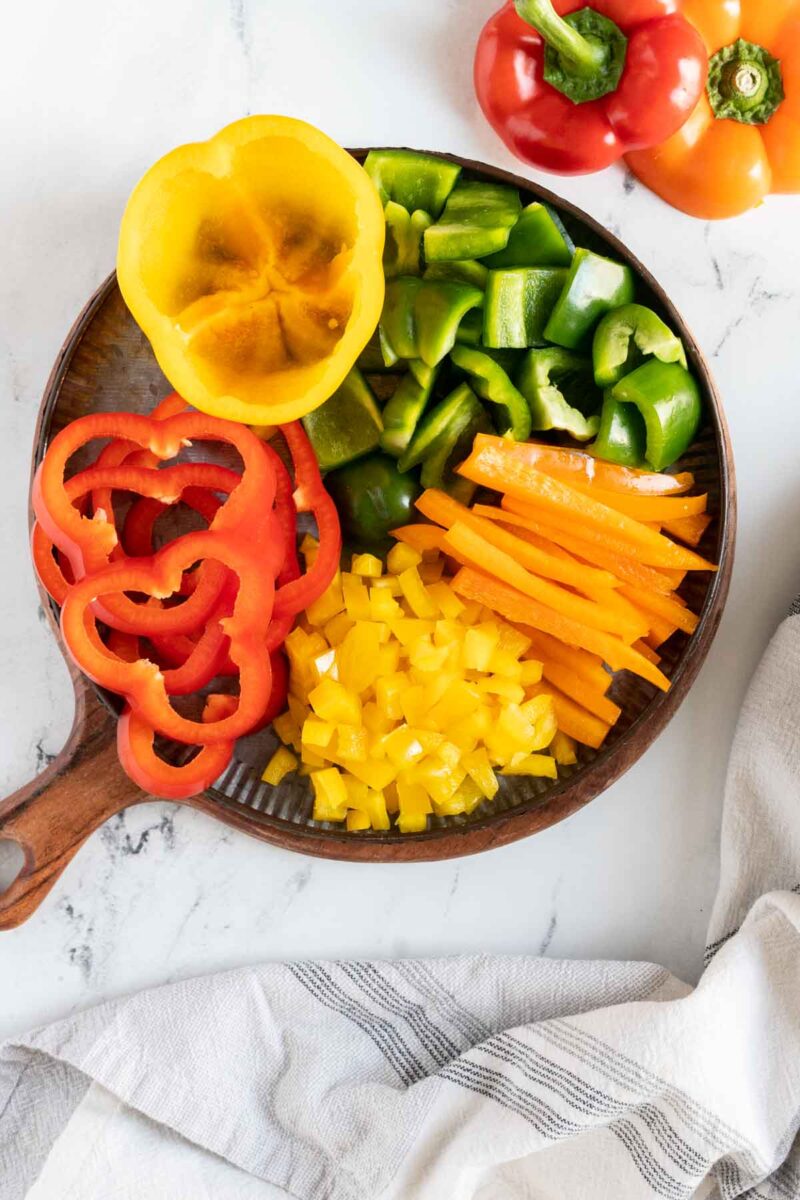
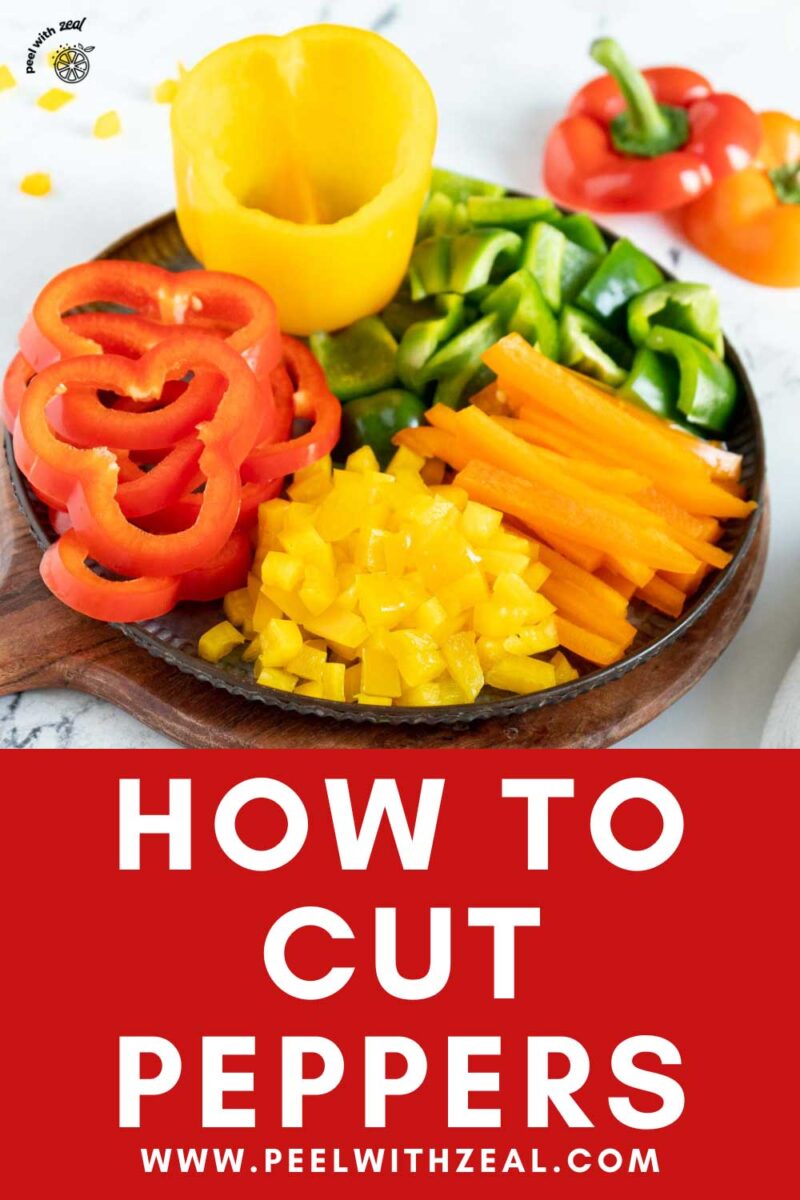
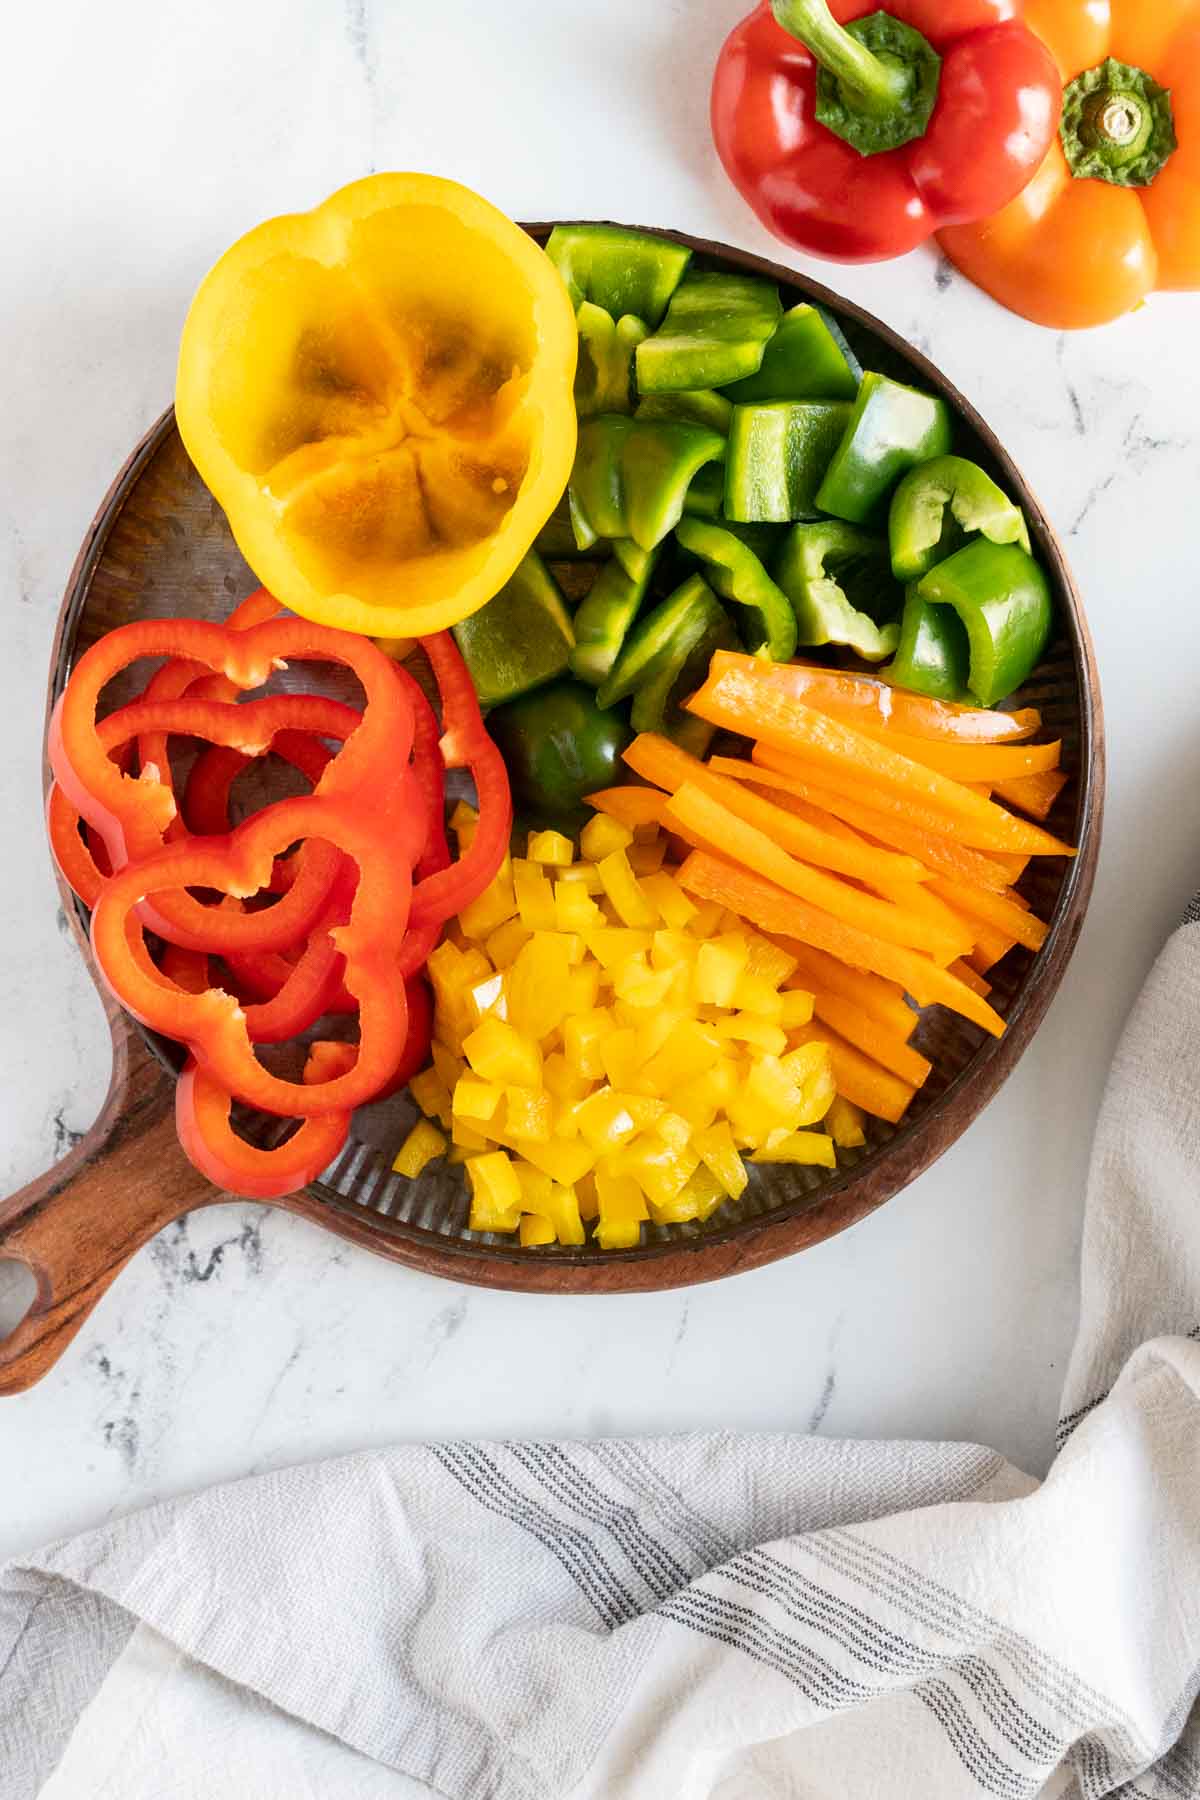
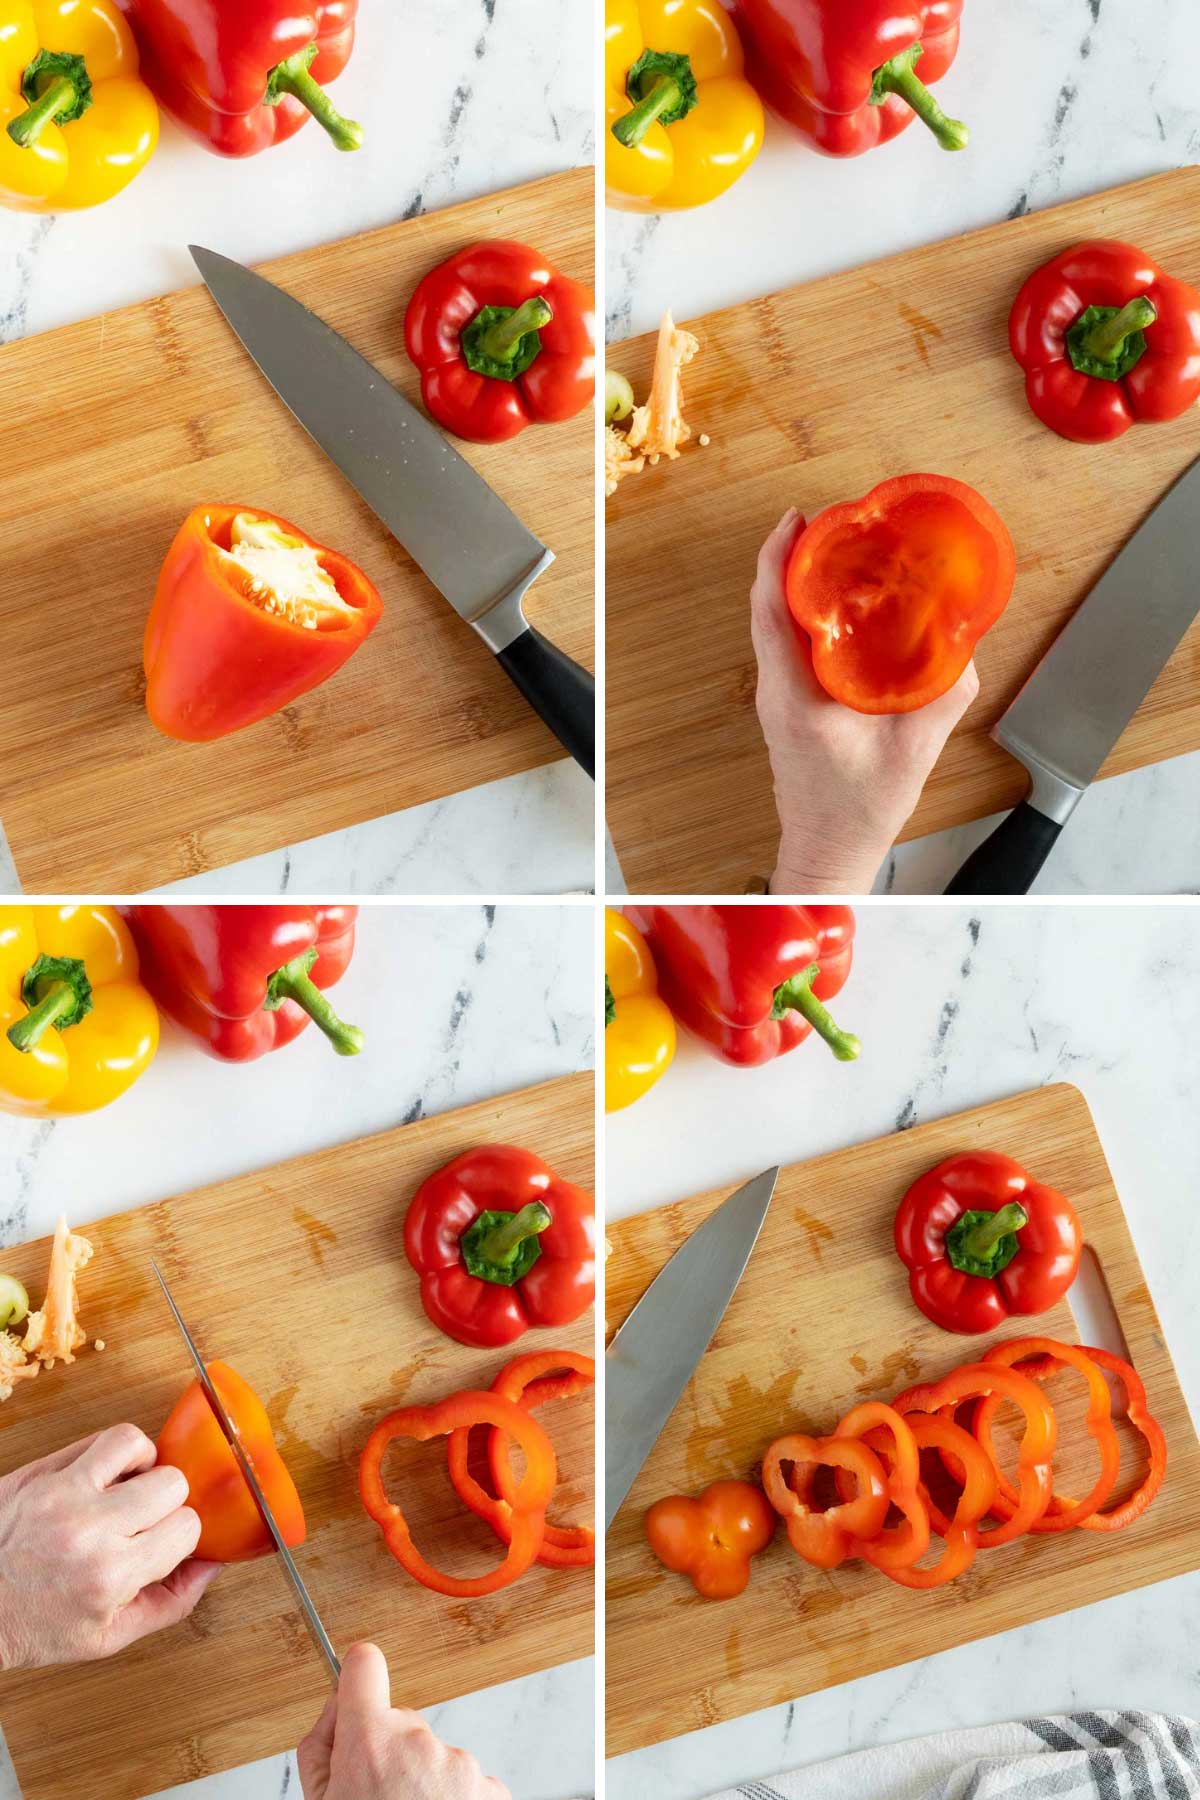
Bell Pepper Rings
Place the pepper on its side. Hold one down in the center with your hand. Cut off the top ¼ inch of the stem end. Run your knife around the inside edge of the pepper to remove the core and seeds.
Place pepper on its side and cut it into thin rings. Repeat this process for each pepper you are using.
Rings are great for garnishes and recipes like our house salad.
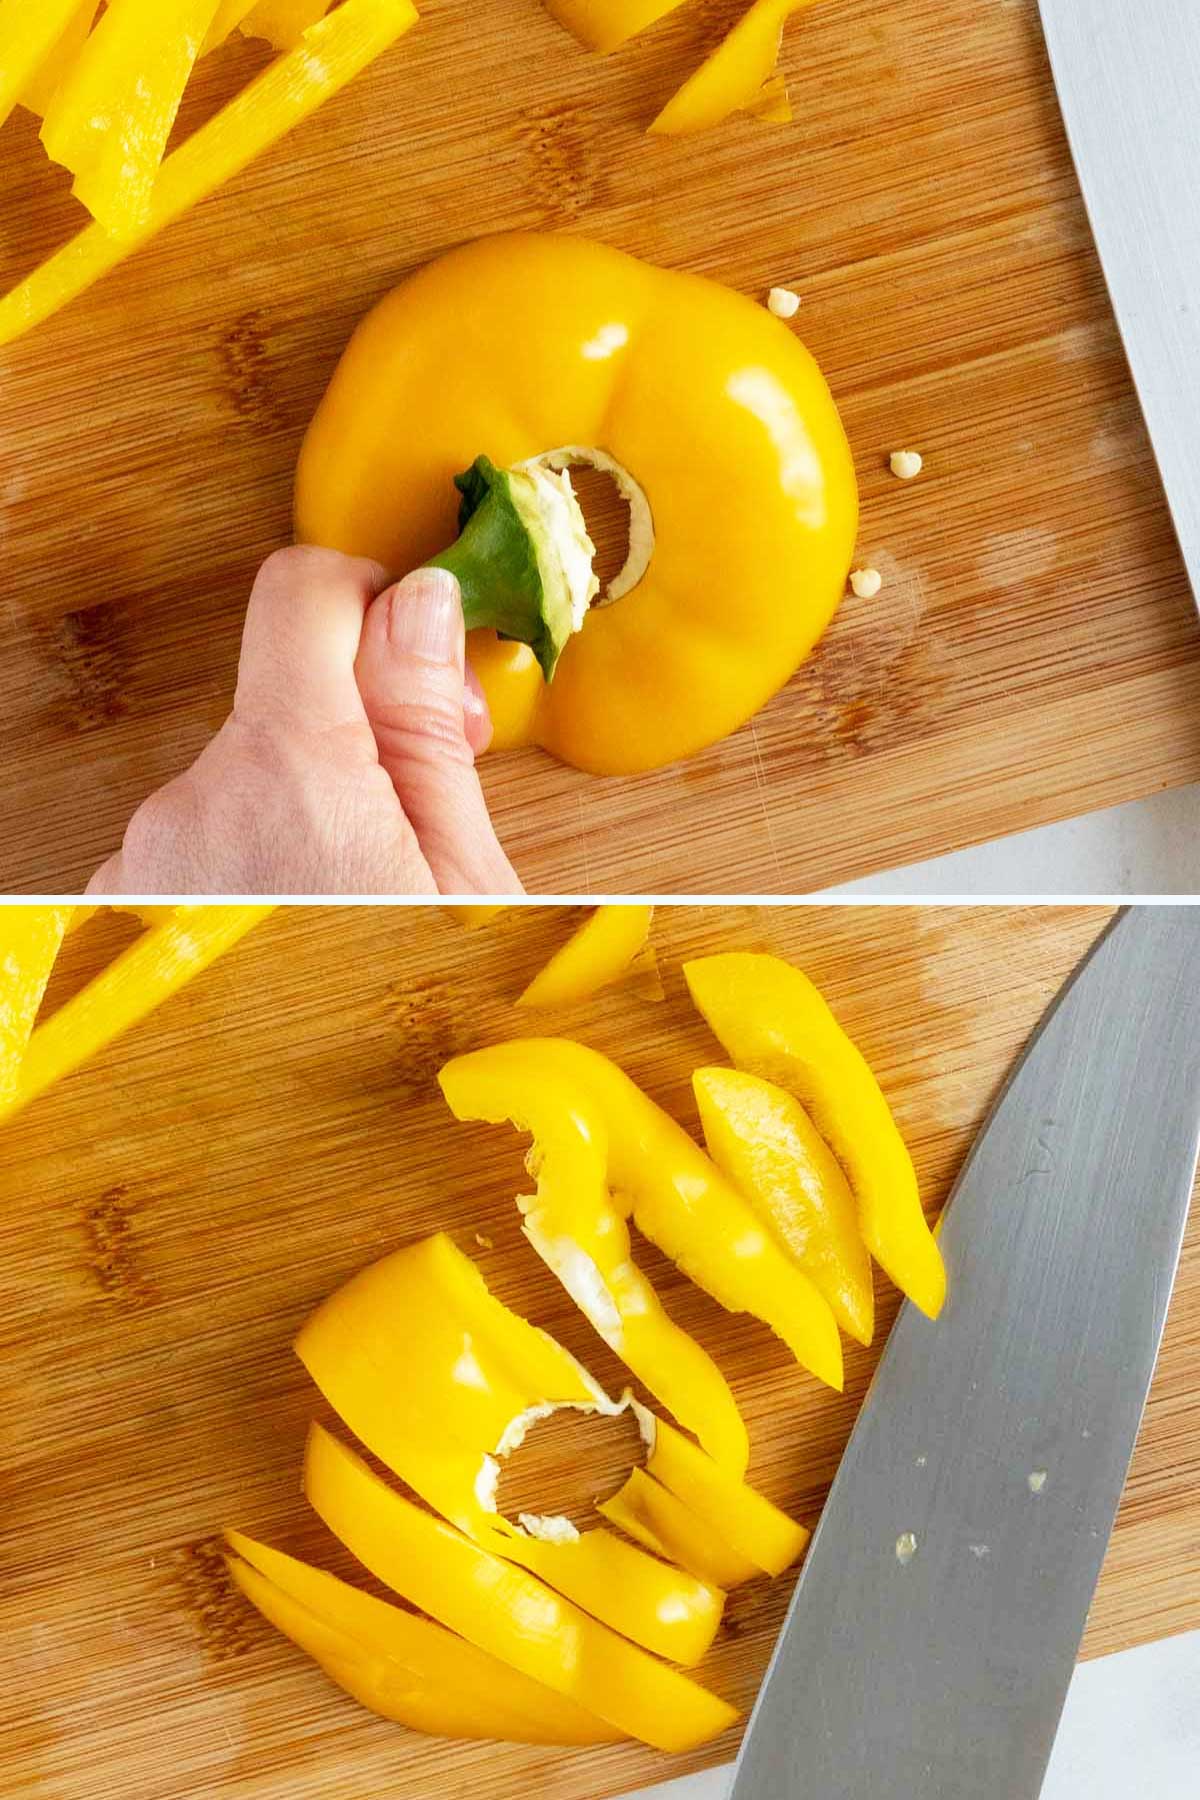
You can remove the stem from the top portion and dice the pepper top for use in other recipes.
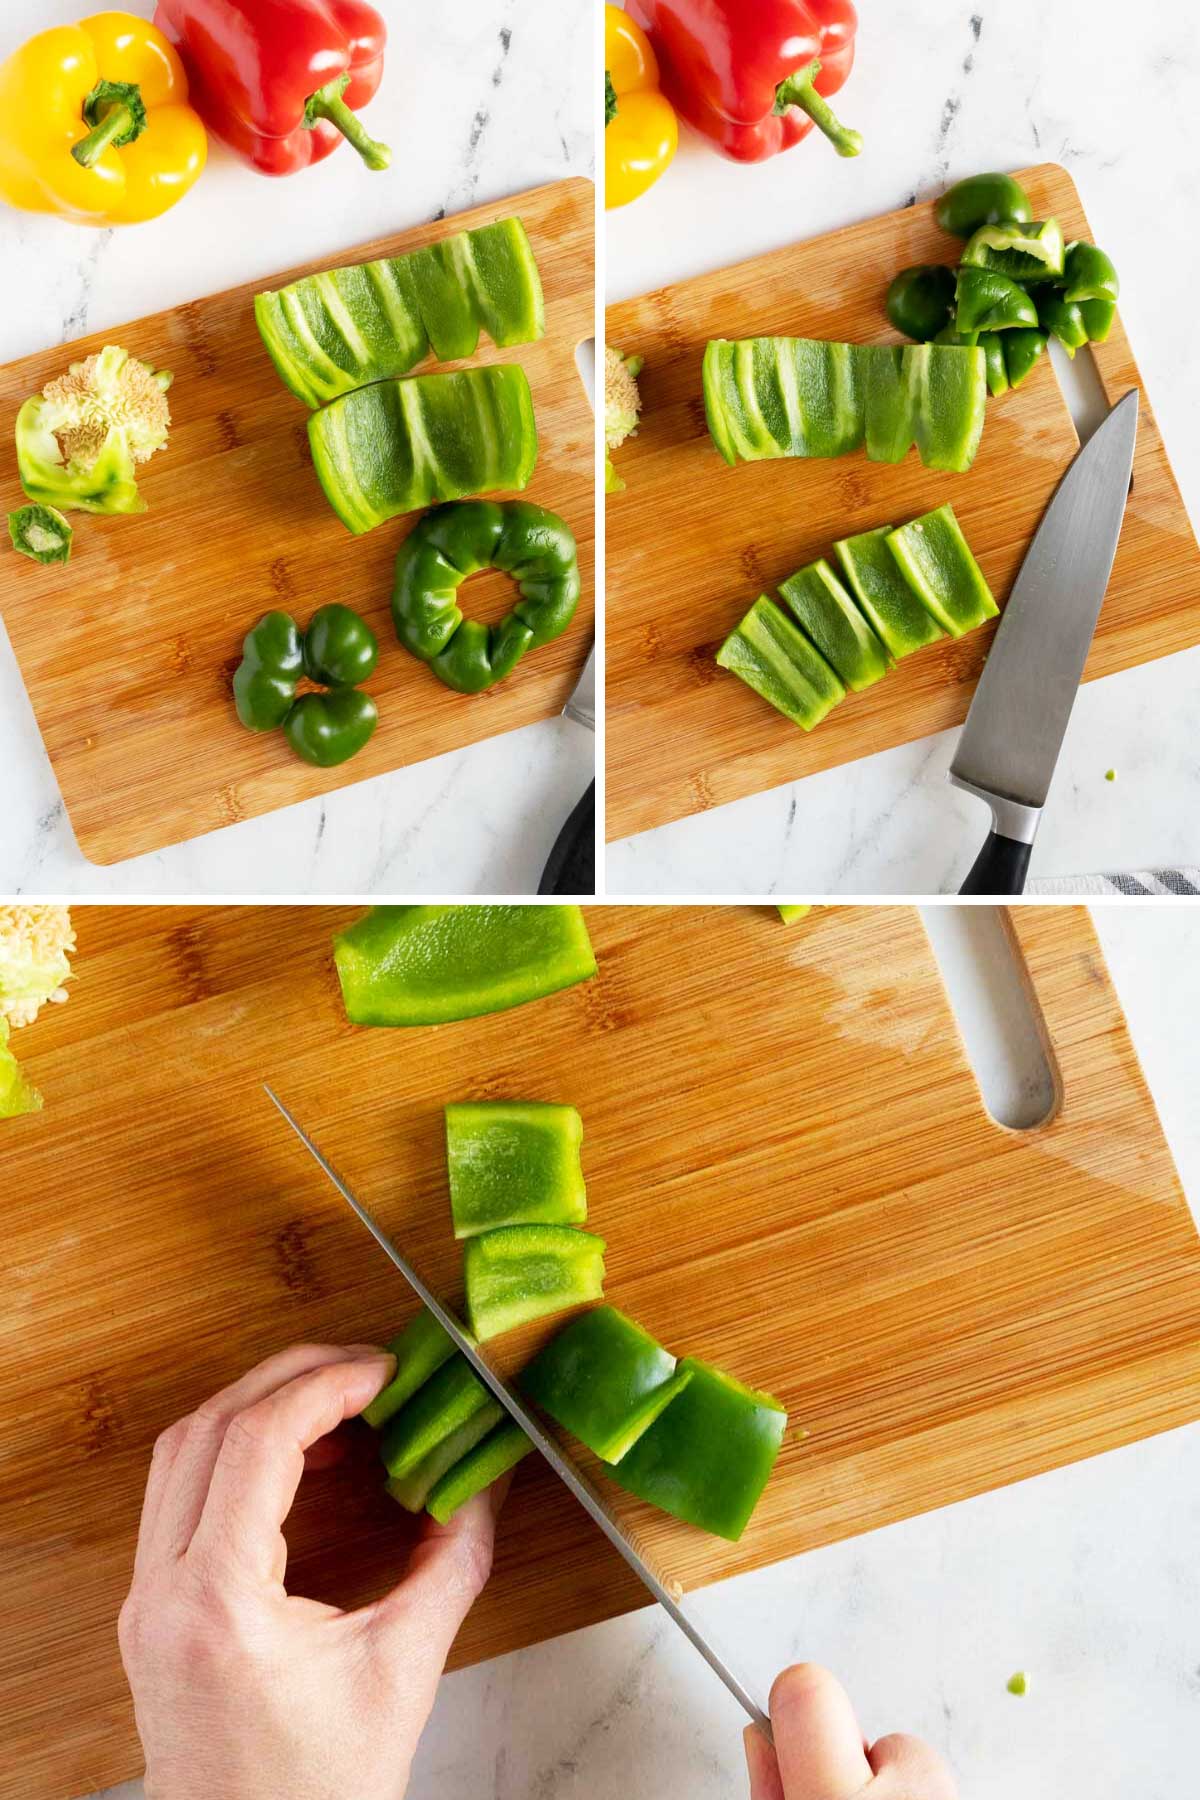
Julienned Bell Peppers (Thin Strips)
Place the pepper on its side. Hold one down in the center with your hand. Cut off the top ¼ inch of the stem end, rotate, and take a ¼ inch off the bottom end.
Remove the seeds and ribs from the inside of each pepper half by sliding your knife along the inside.
You can also use your knife to cut deeper and remove the pith. This isn't normally done with sweet peppers but some people prefer to do this with bitter green peppers.
Cut each pepper half into thin slices, about ¼ inch wide.
Julienned bell peppers are most often used in making stir-fry recipes, sheet pan dinners like my Italian sausage and peppers, and fajitas veggies. This is also the most common cut when making a veggie tray.
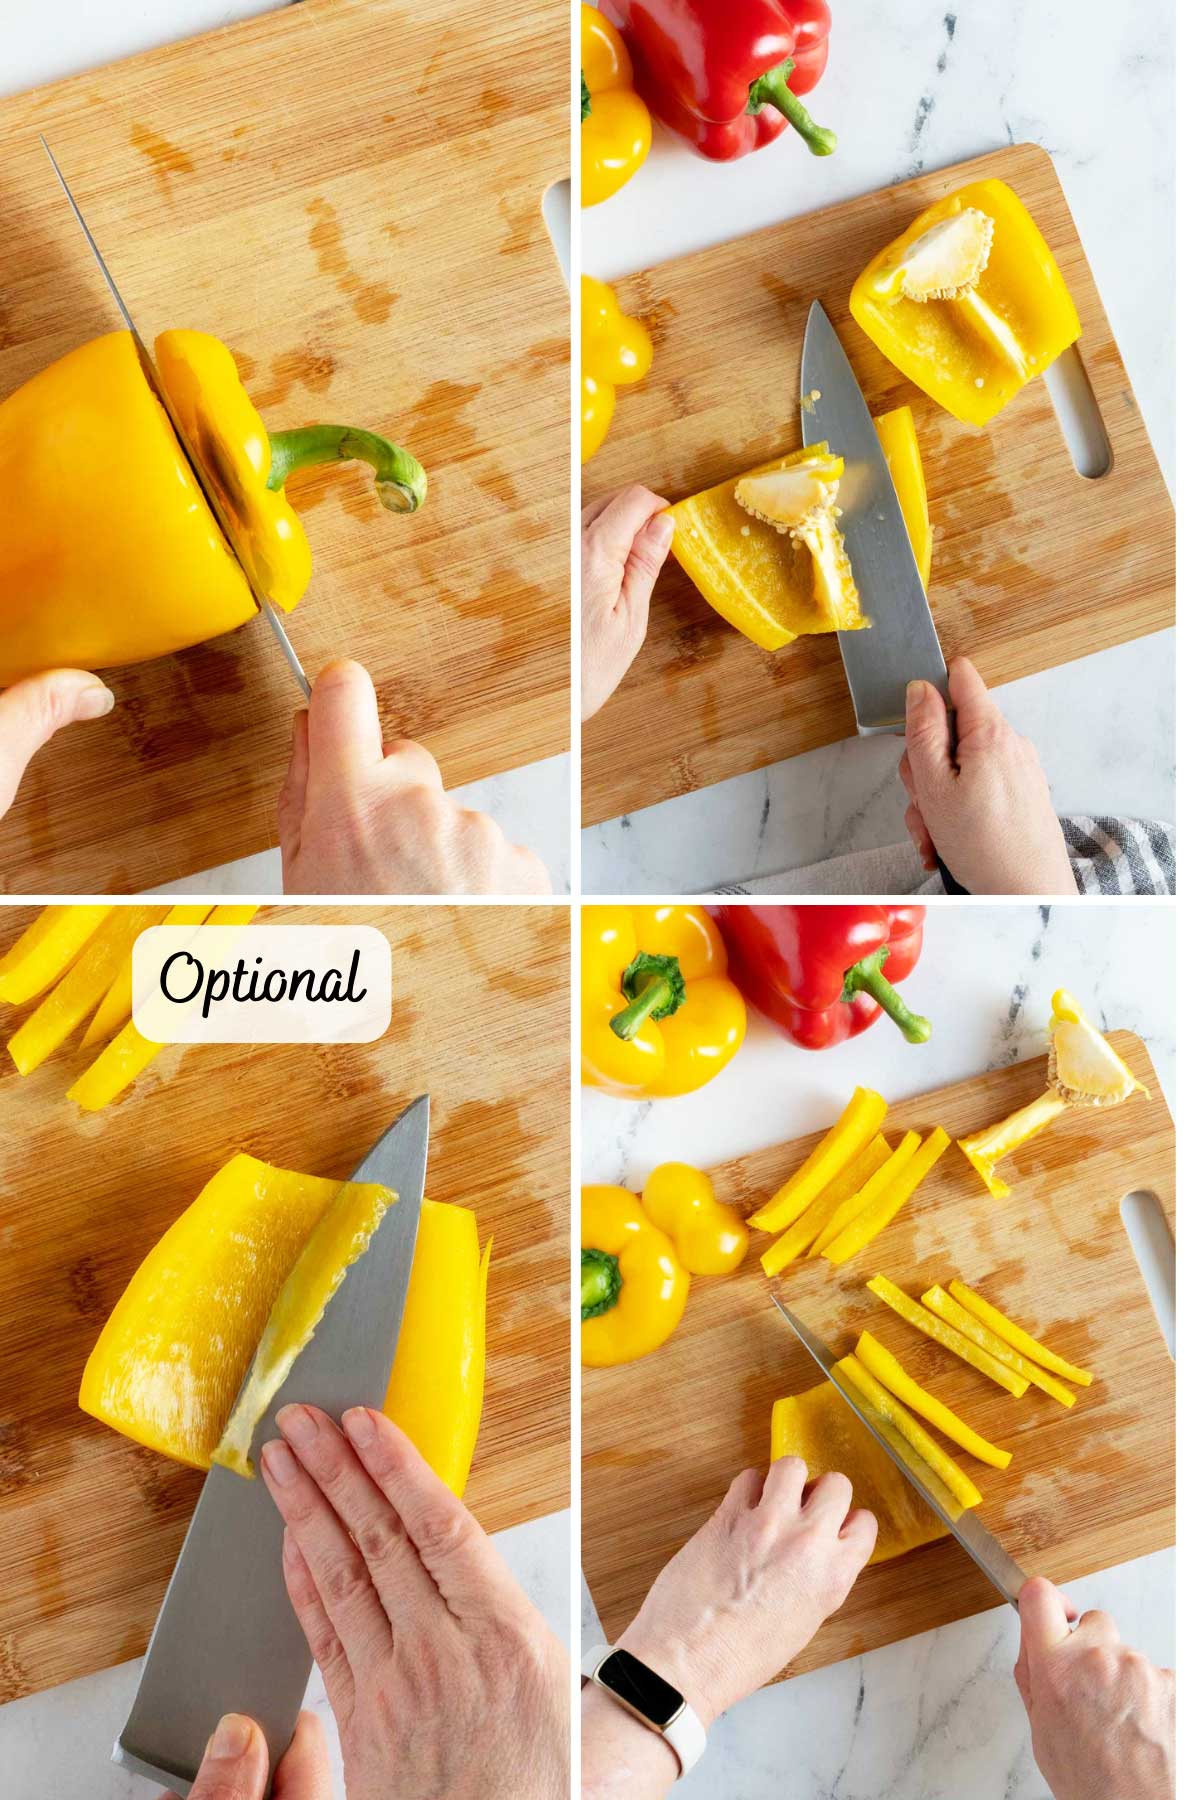
You can remove the stem from the top and slice both the bottom and the top into thin strips.
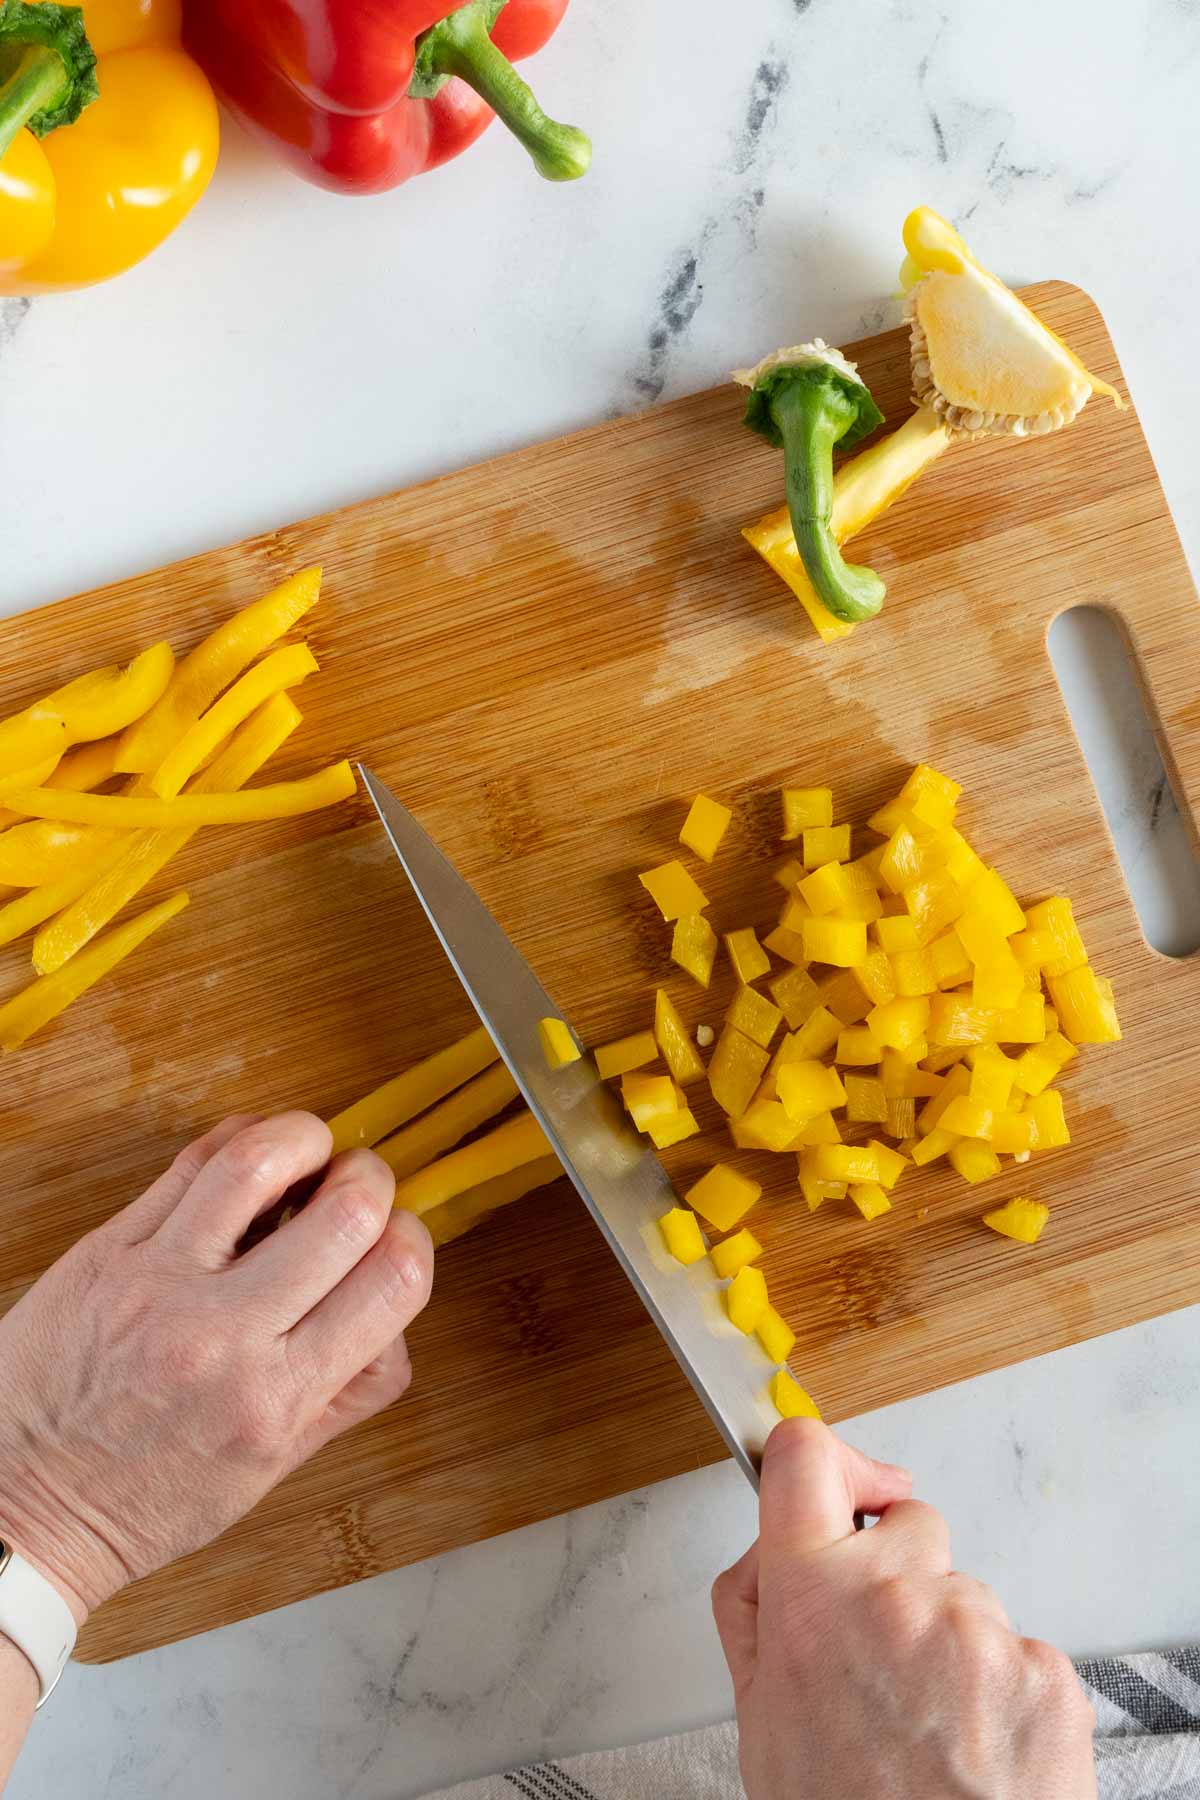
Diced Bell Peppers
Follow the directions for the julienned peppers. Rotate the long strips of pepper 90 degrees. Cut into smaller pieces.
Small ¼ inch pieces is a dice and ⅛ pieces are considered finely diced, technically called brunoise.
Bell Peppers for Kabobs
Creating chunks of peppers is great for chunky soups, curries, and best of all kabobs like my favorite huli-huli chicken kabobs.
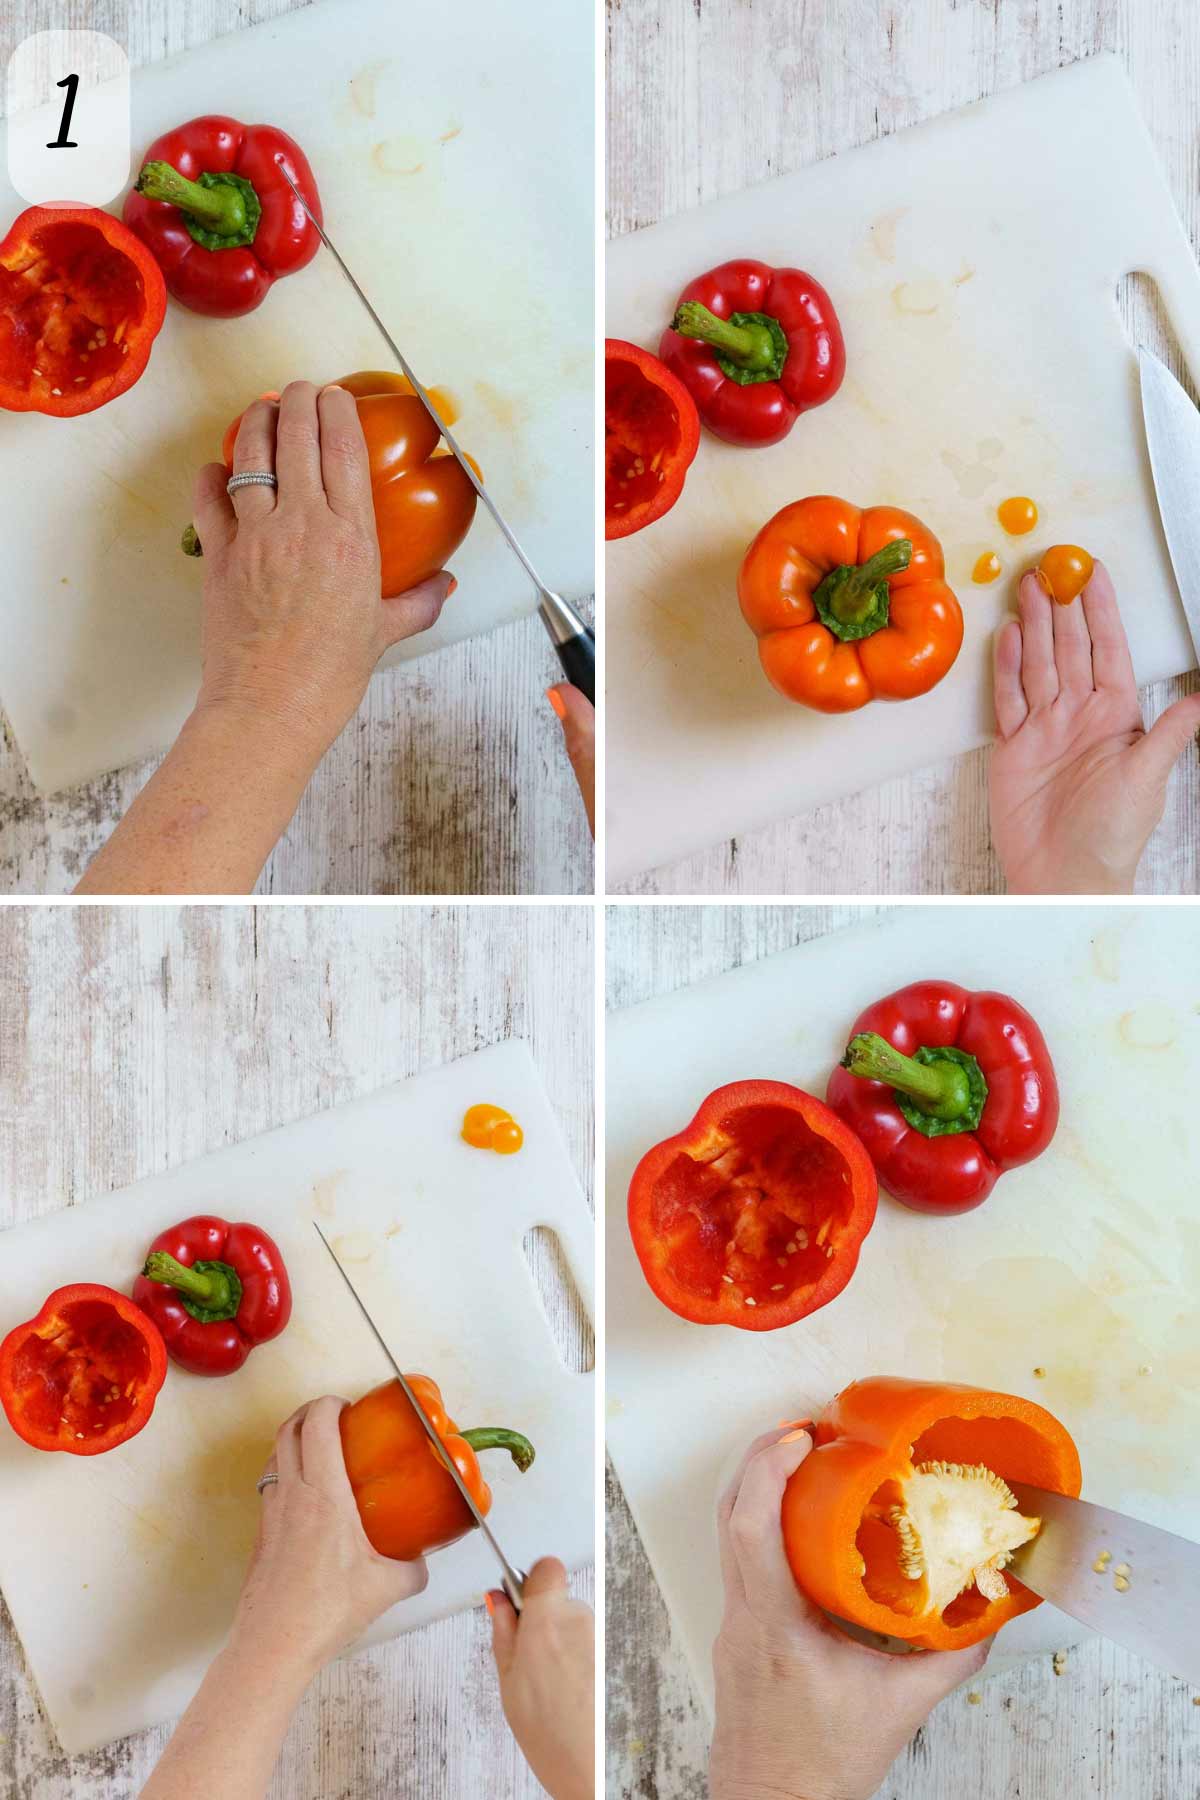
Start by removing the top and bottom of the pepper and slicing it in half lengthwise. Remove the seeds and core.
Cut each half into 1-inch pieces by cutting thick strips, rotating, and cutting into cubes. This will be 4 to 8 pieces per pepper depending on the size of your pepper.
Stuffed Bell Peppers
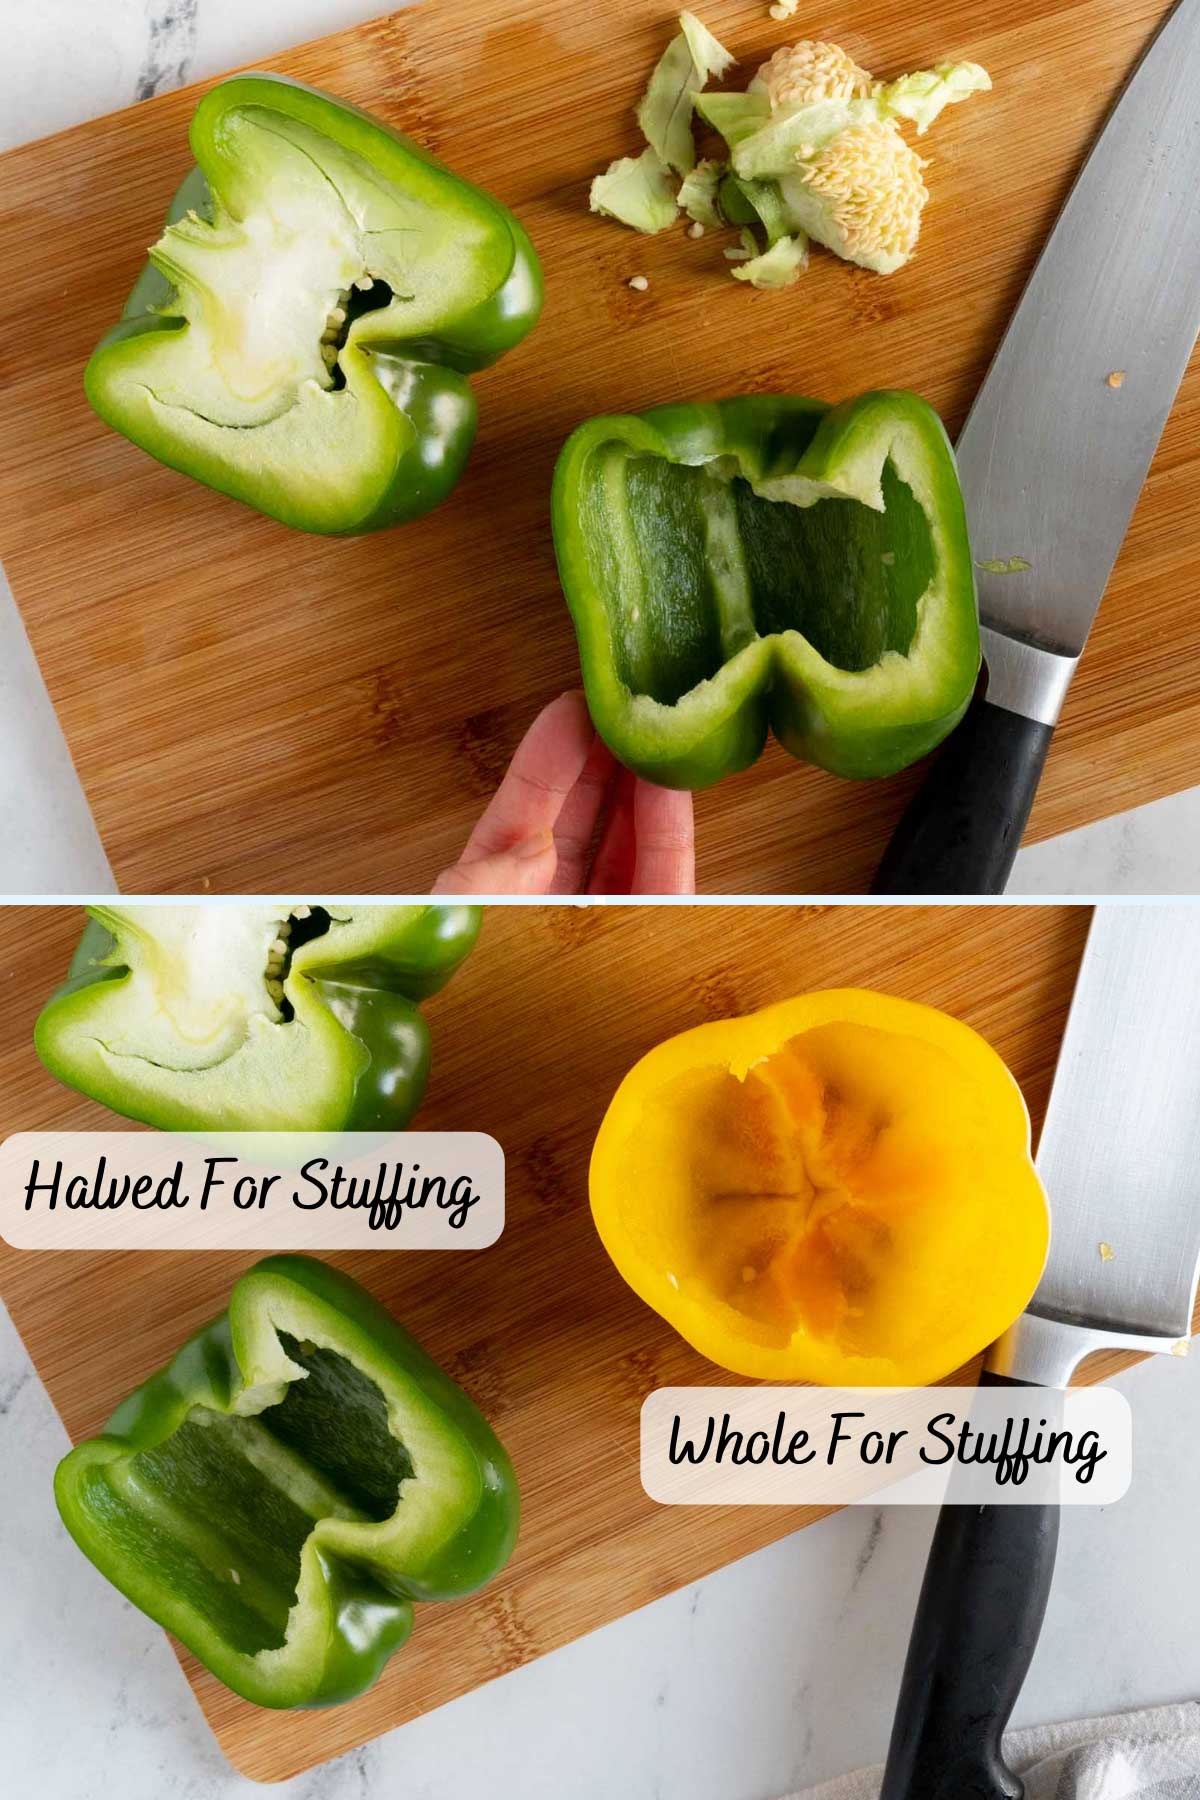
Making stuffed peppers vertical allows you to get more filling in. Start by cutting off a tiny bit of the bottom of the pepper so it stands upright (1).
Then cut off the top of the pepper, including the stem and a little of the flesh.
Remove the seeds and ribs from the inside of the pepper using a knife or a spoon.
The pepper should now be hollow, with a cavity for the stuffing.
Save the tops so you can serve them with the peppers.
Alternatively, you can cut the pepper in half lengthwise and spoon out the core and seeds.
👩🏻🍳Jen's Top Tip
Don't waste the tops and the bottoms you trim off. Add them to salads, rice, or any of your favorite recipes!
🌡️How to Store Bell Peppers
Before cutting, whole peppers should be stored in your fridge's produce drawer. You can also place them in an open plastic bag. They will keep for 1 to 2 weeks.
If you have any peppers past their prime turn them into roasted red peppers.
Once chopped place the pepper pieces in an airtight container like a plastic ziptop bag. Store in the refrigerator for 3 to 4 days.
💬How far in advance can you cut peppers?
When properly stored in an airtight container, cut bell peppers will last for 3 to 4 days in the refrigerator.
Did you enjoy making this recipe? Show it some love with ⭐⭐⭐⭐⭐ and leave a comment! Hungry for more FLAVORFUL recipes?
📖 Recipe Card
How to Cut a Bell Pepper
Ingredients
- 5 bell pepper any color
Instructions
- Wash and dry the peppers thoroughly.5 bell pepper
- RINGS: Place the pepper on its side. Hold one down in the center with your hand. Cut off the top ¼ inch of the stem end. Run your knife around the inside edge of the pepper to remove the core and seeds. Place pepper on its side and cut into thin rings.
- THIN STRIPS (Julienned): Start by removing the top and bottom of the pepper and slicing it in half lengthwise. Remove the seeds and core. Slice each half into ¼inch strips.
- DICED: Follow the directions for the julienned peppers. Rotate the strips 90 degrees and cut them into small pieces.
- CHUNKS: Start by removing the top and bottom of the pepper and slicing it in half lengthwise. Remove the seeds and core. Cut each half into 1-inch pieces.
- STUFFED: Slice off the top of the bell peppers to create a cup. Remove the seeds from the cap and stem of the pepper and set aside the cap. Slicing a small piece off the bottom of the peppers will help them stand upright.
Notes
- Place them in an open plastic bag in the crisper drawer of your fridge for 1 to 2 weeks.
- Place them in an airtight container or in a sealed plastic bag with a dry paper towel.
- Store in the refrigerator for 3 to 4 days.
Comments
No Comments